Table of contents
- How to password-protect a folder on Mac
- How to password-protect files on Mac
- How to password-protect a PDF on Mac
- How to lock a Mac Note
- How to password-protect JPG on Mac
- How to encrypt Mac hard drive
- How to encrypt external hard drive on Mac
- Encrypt external drives using Finder
- Encrypt external drives using Disk Utility
- Encrypt disk images using Disk Utility
- How to encrypt your Time Machine backups
- Conclusion
If you’re serious about safeguarding sensitive information, password protection on your files and folders is the most sensible way. Think of it this way: if you let someone use your Mac or your computer gets stolen, how can you be sure someone else isn’t looking through your private files?
Read on to learn about the macOS password protection features you need to use to stay safe, including how to put a password on a folder on a Mac.
How to password-protect a folder on Mac
One of the most effective ways to password-protect a folder on Mac is to first turn your folder into a disk image file (.dmg) and then lock it. You can use this method to create secure archives of files and folders or even entire disks.
Follow these steps to create a password-protected folder on Mac:
- Find or create a folder you need to encrypt and add the relevant files to it.
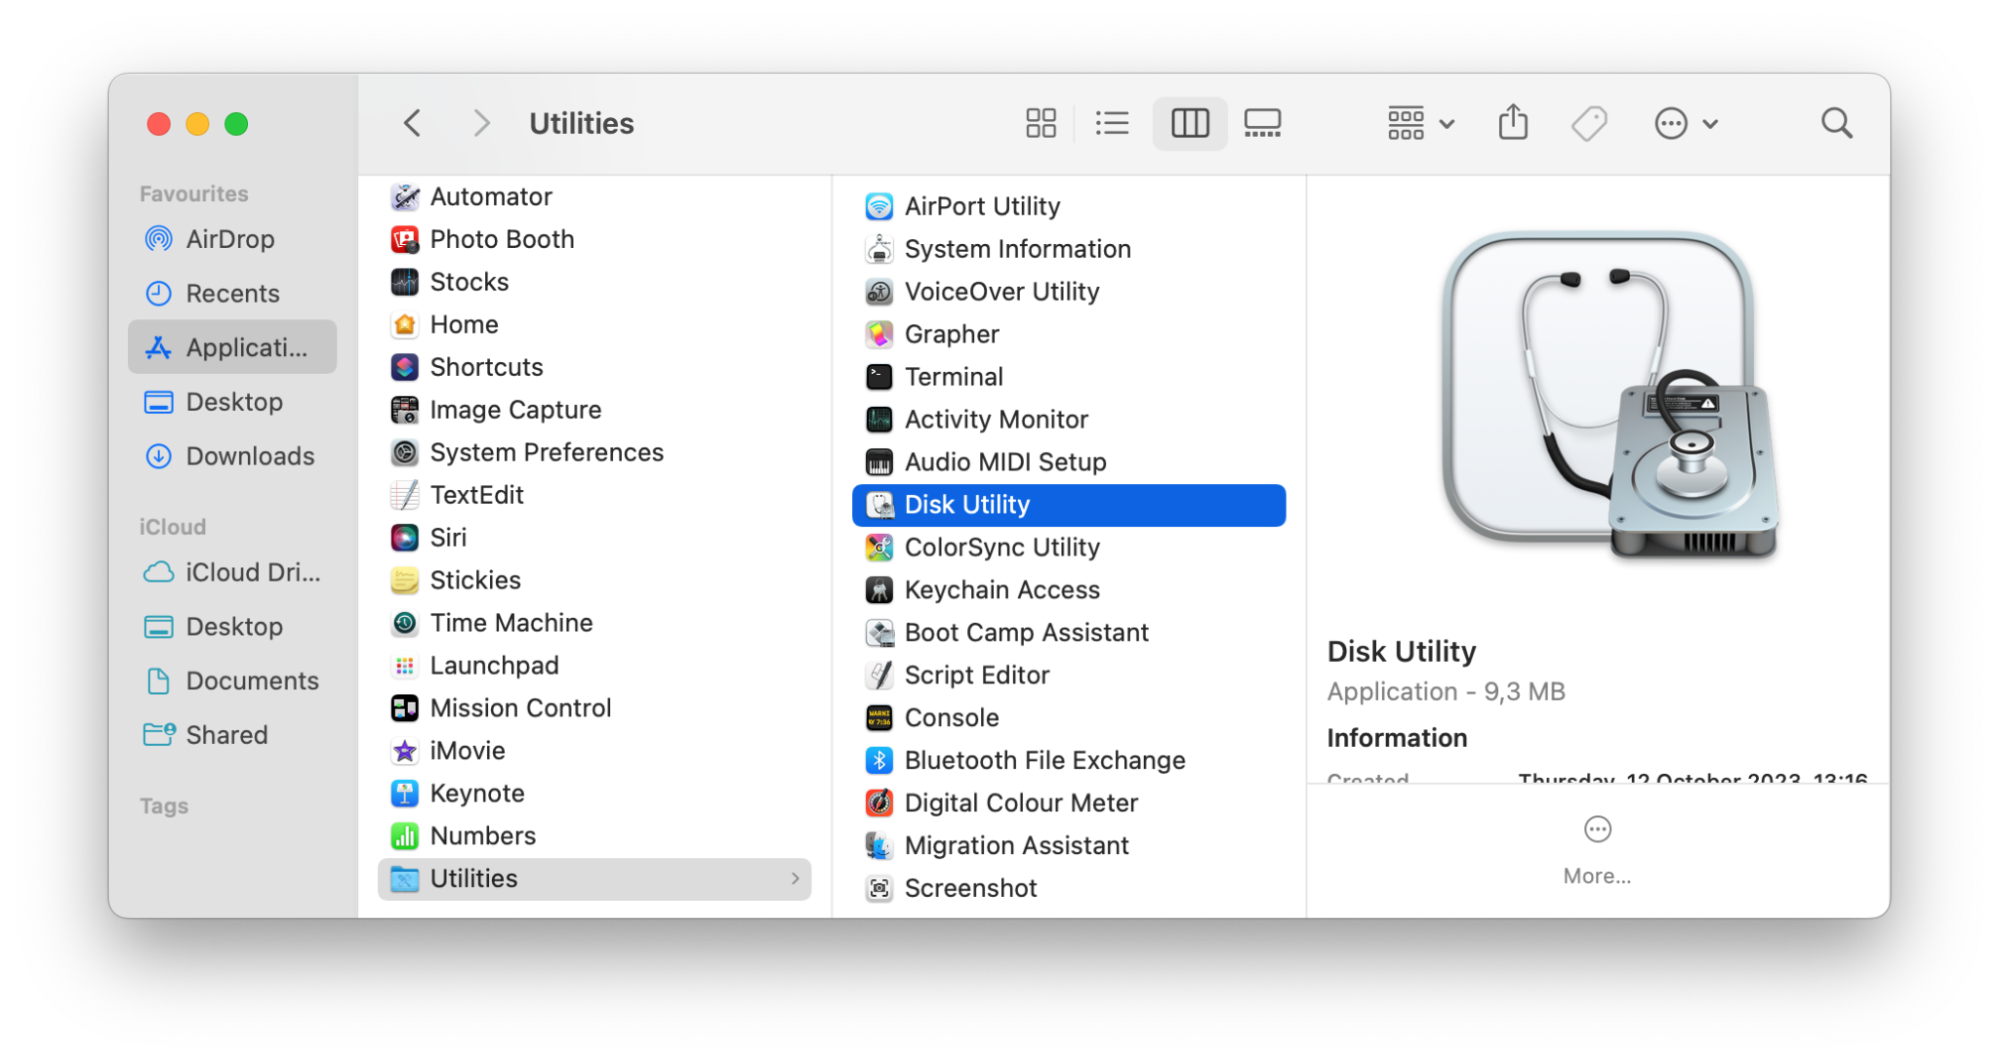
- Open Finder and go to Applications > Utilities > Disk Utility.
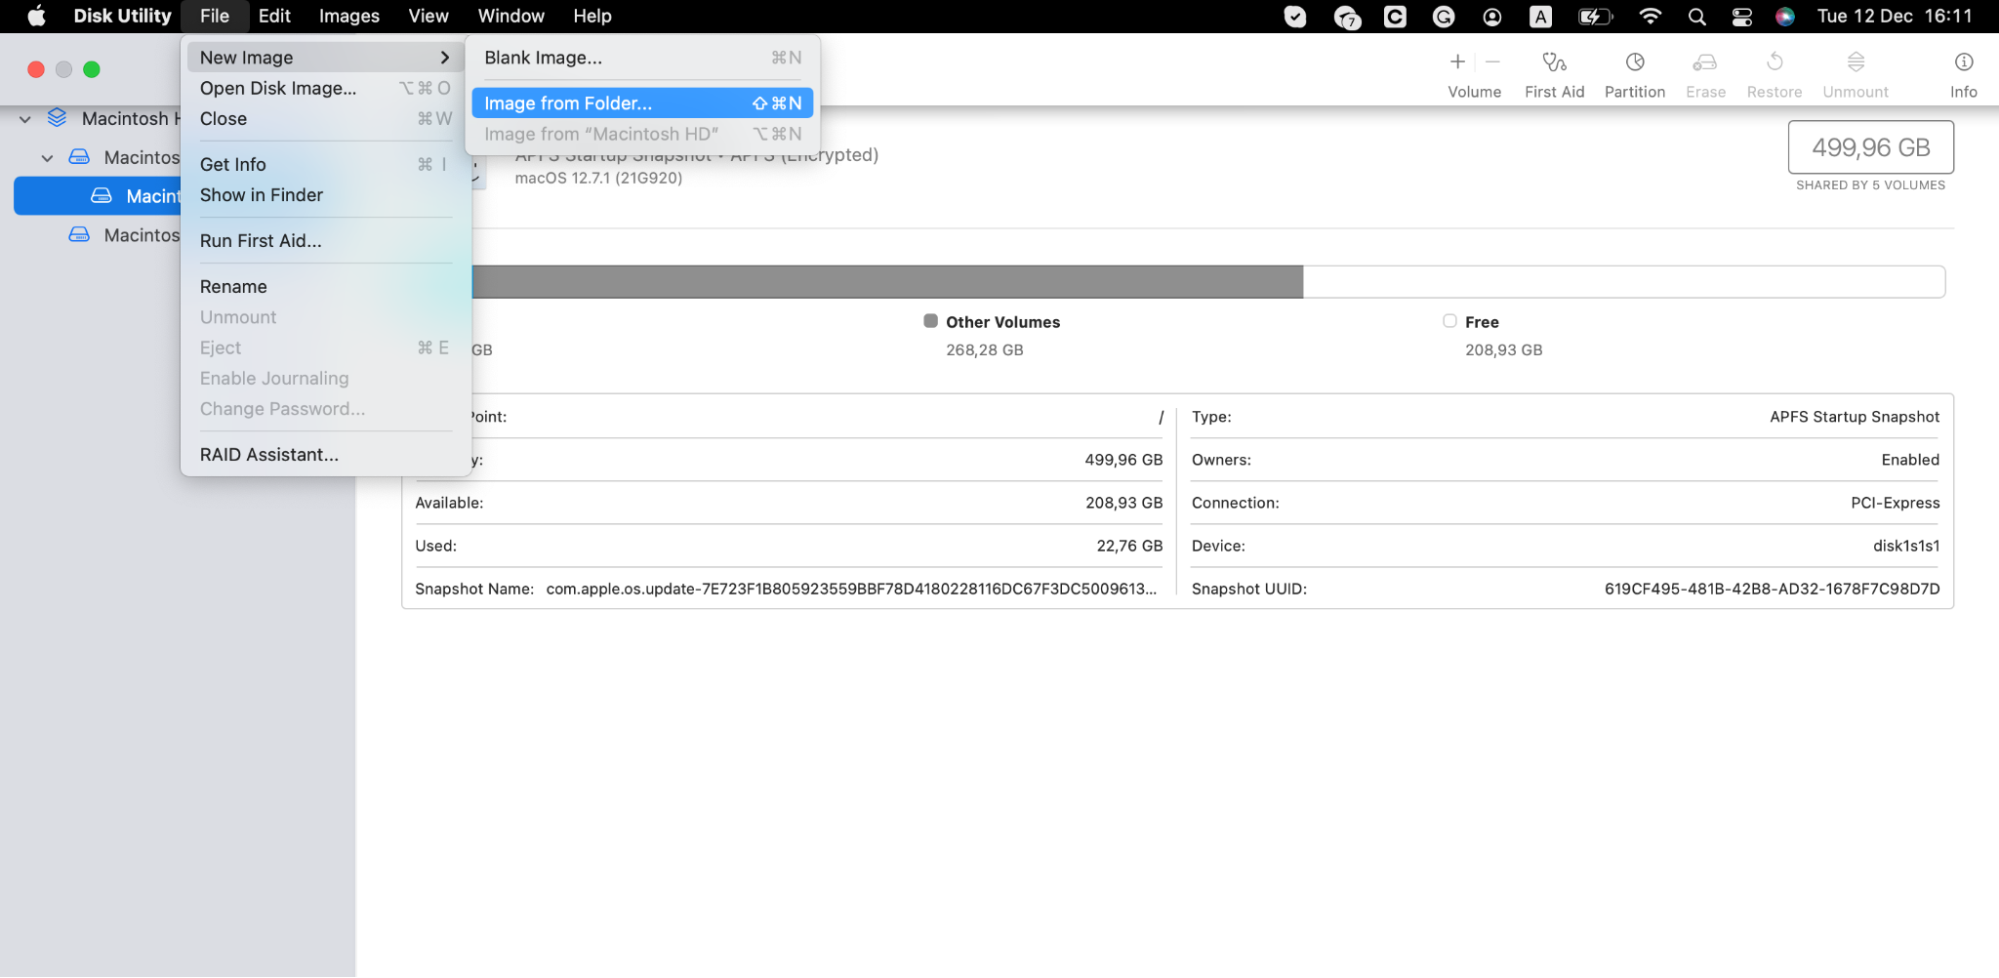
- From the menu bar, select File > New Image > Image From Folder.
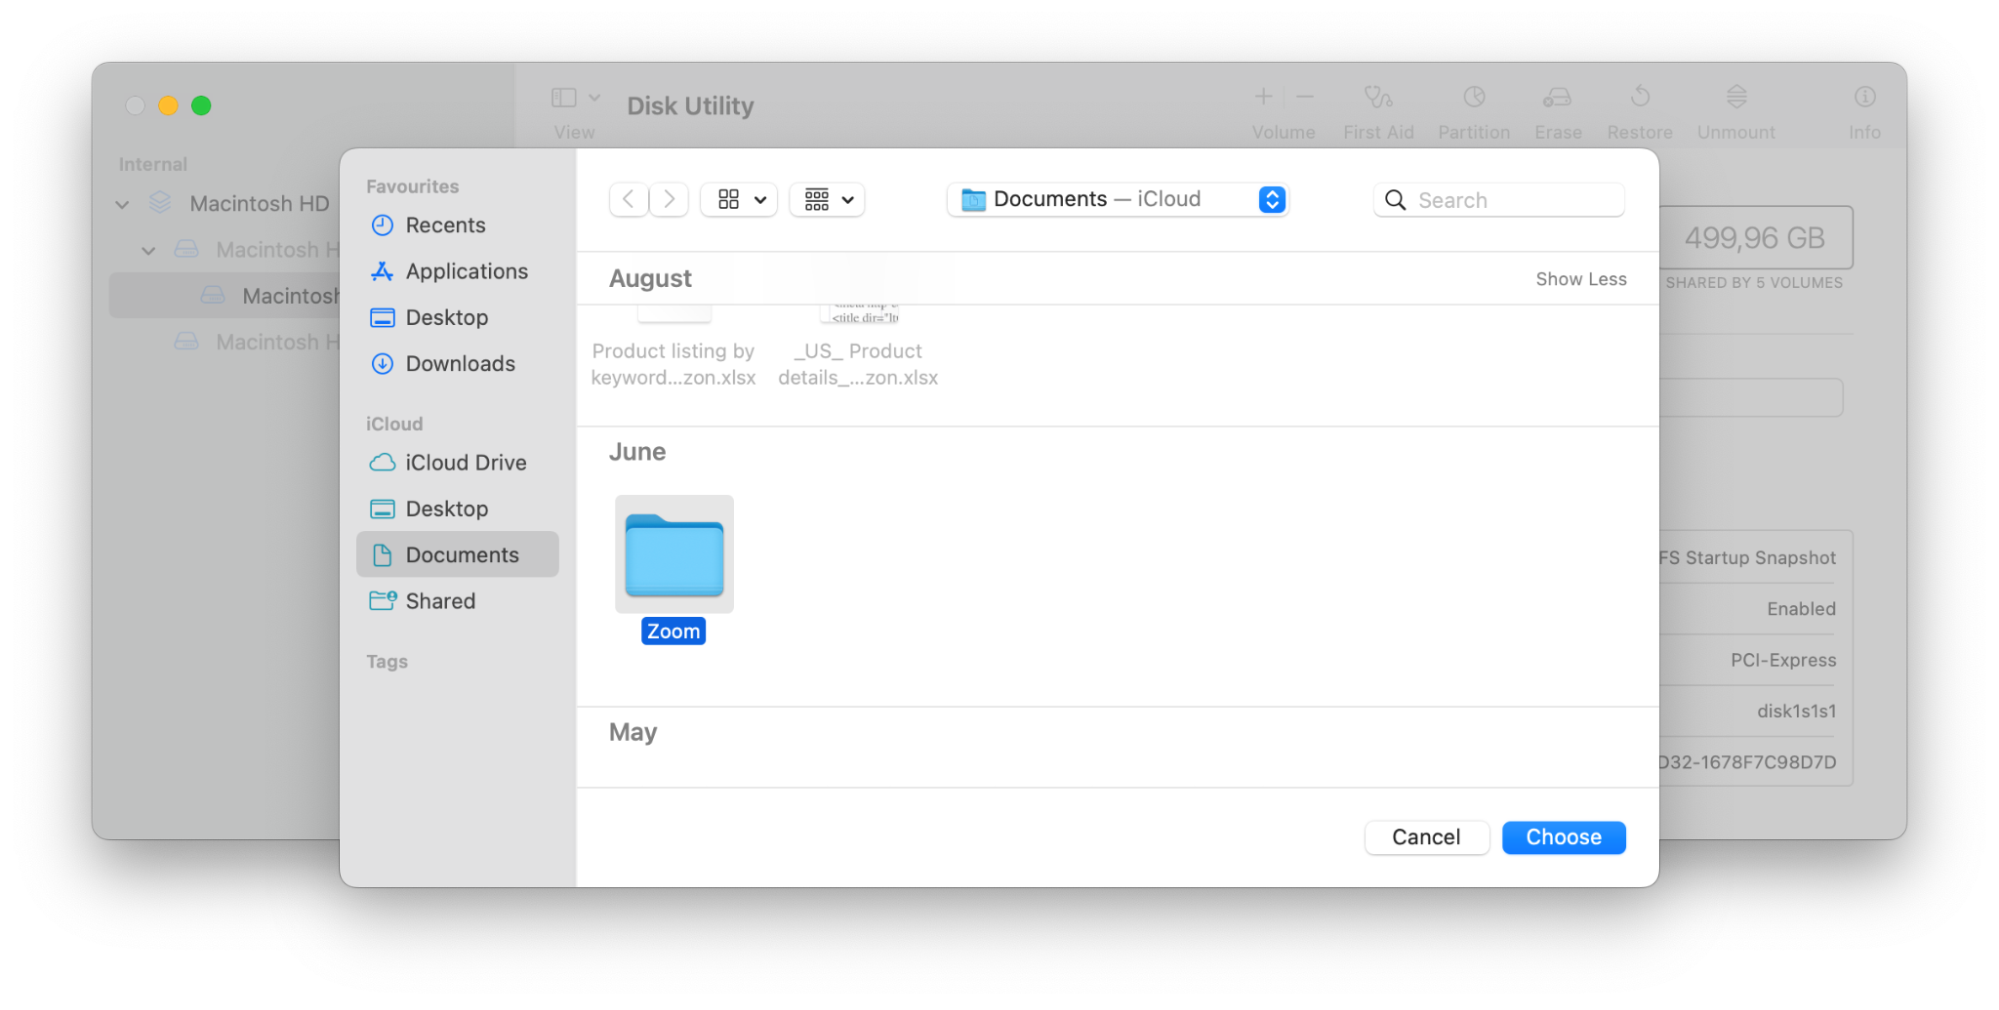
- Once the folder window opens, choose the folder you want to protect with a password.
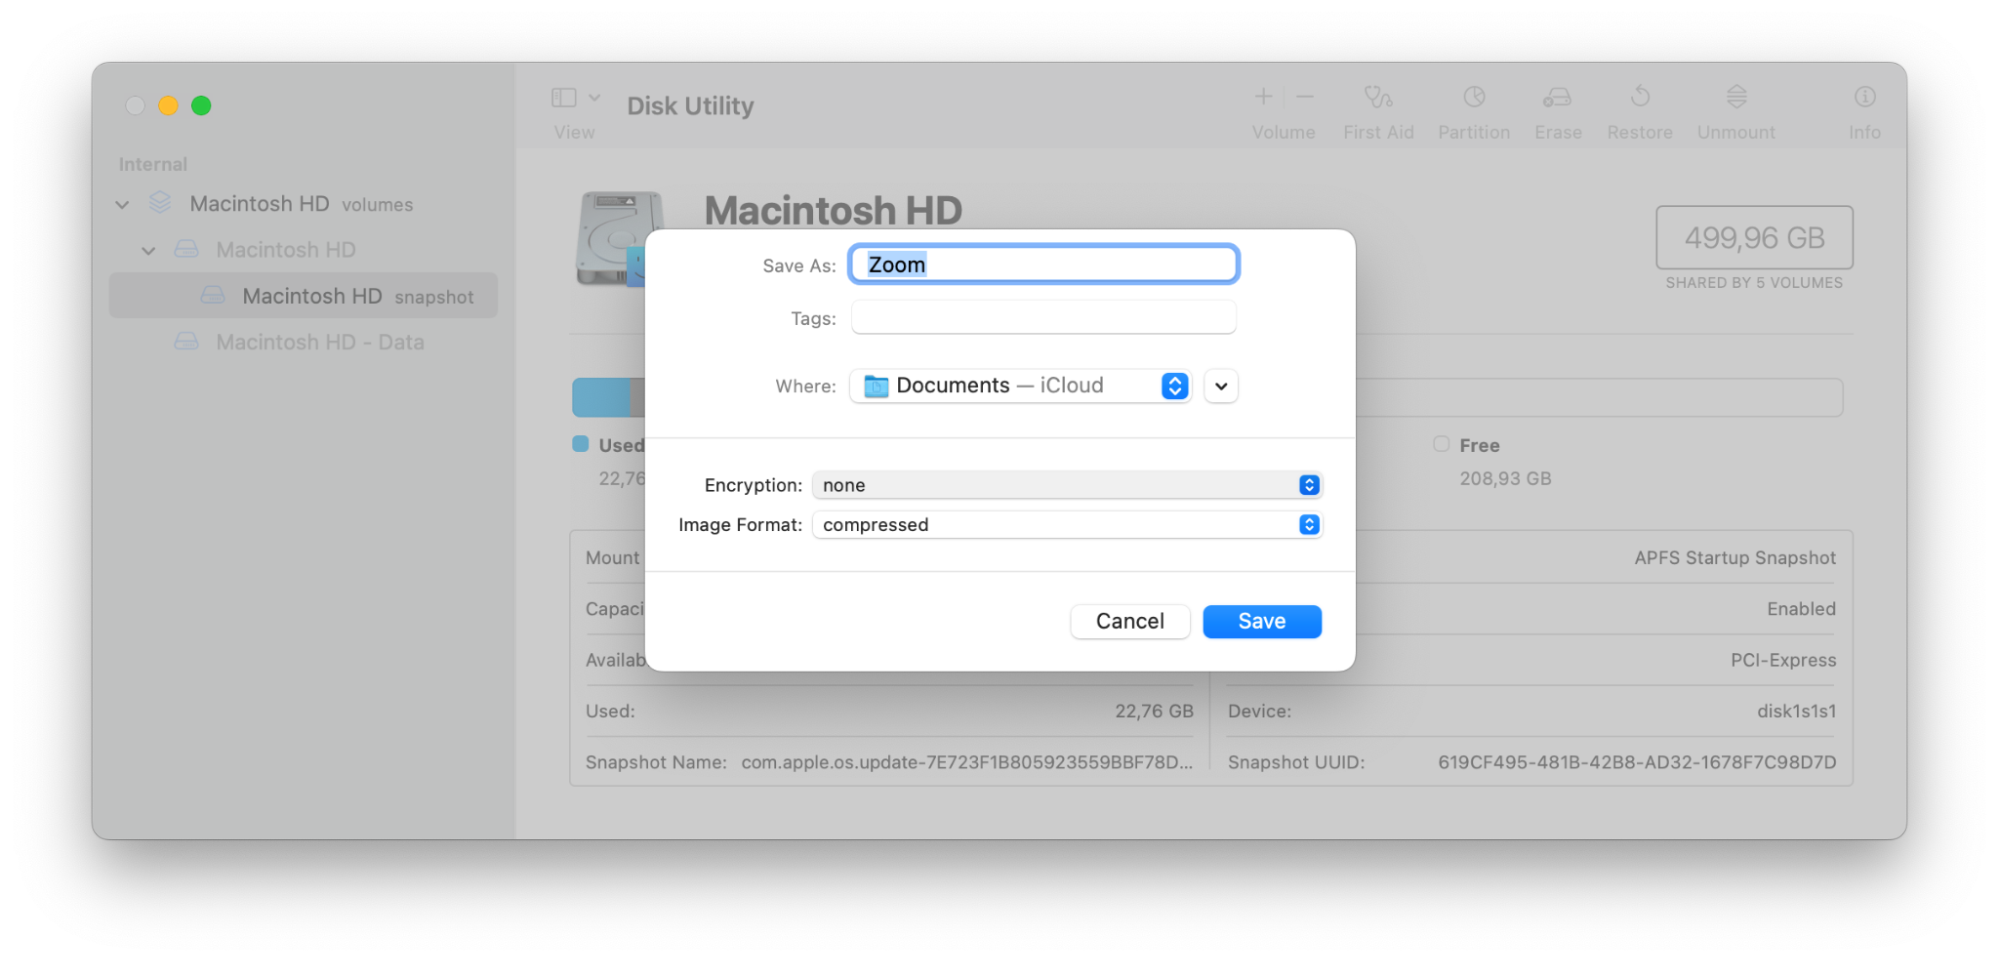
- Within the pop-up window that appears, you’ll see menus for both Encryption and Image Format.
- Select the level of encryption you want to implement (128-bit or 256-bit AES Encryption).
- Add a password to your folder on Mac.
- Click the menu next to Image Format and select Read/Write.
- Click Done and exit the window.
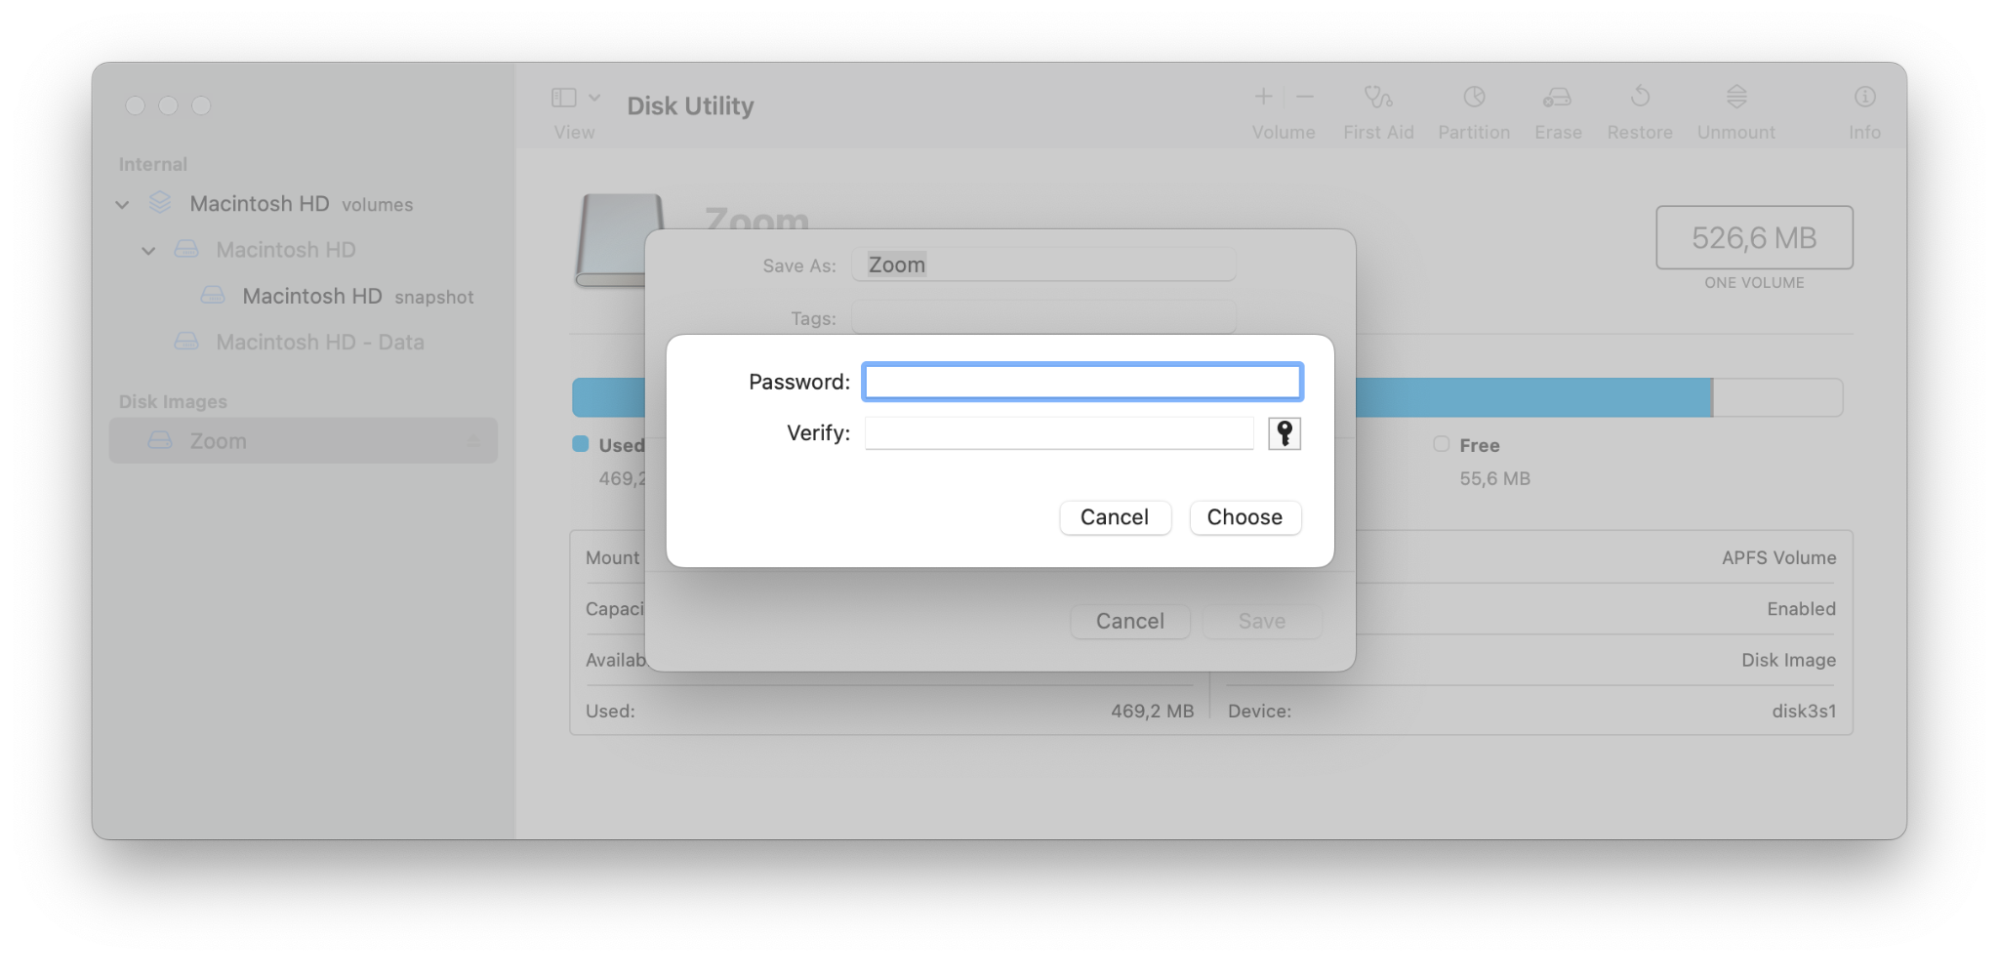
That’s it! You have successfully learned how to lock a folder on Mac, but you’re not quite done yet.
Remember
The original, unencrypted folder is still on your computer. Double-check to confirm you can access the disk image and files inside it. Only now can you go ahead and delete the original folder, leaving only the locked folder on Mac.
How to password-protect files on Mac
While Disk Utility remains the most secure way to password-protect folders on your Mac, there are few alternative methods to password-protect a file on Mac. The best method for you usually depends on the type of file you want to protect. For instance, you can easily add a password to Pages, Numbers, and Keynote documents within these applications:
- Open your document in Pages, Numbers, or Keynote.
- In your Mac’s menu bar, click File, then Set a Password.
- Enter the password you want to use, then verify it.
- Add a password hint if you wish.
- Click Set Password to confirm.
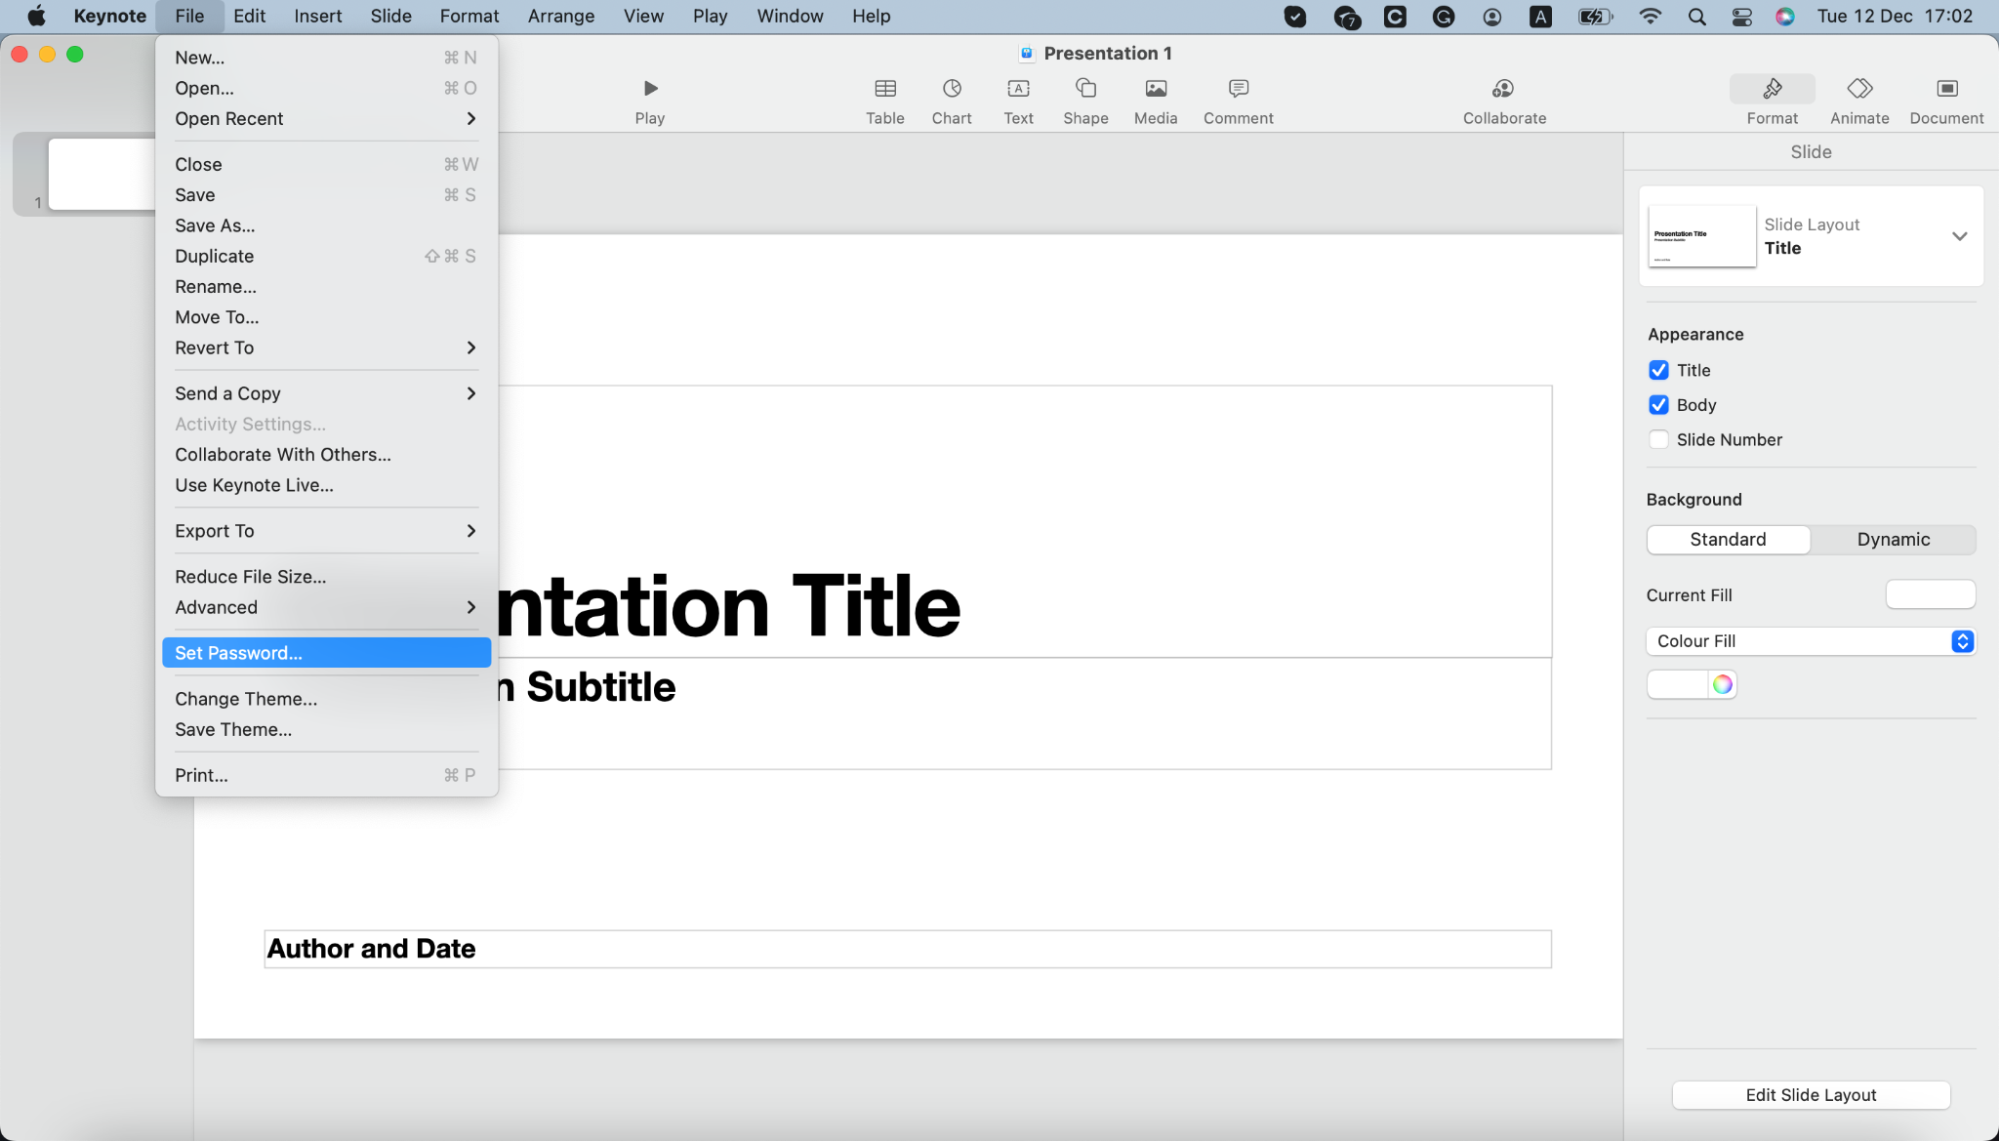
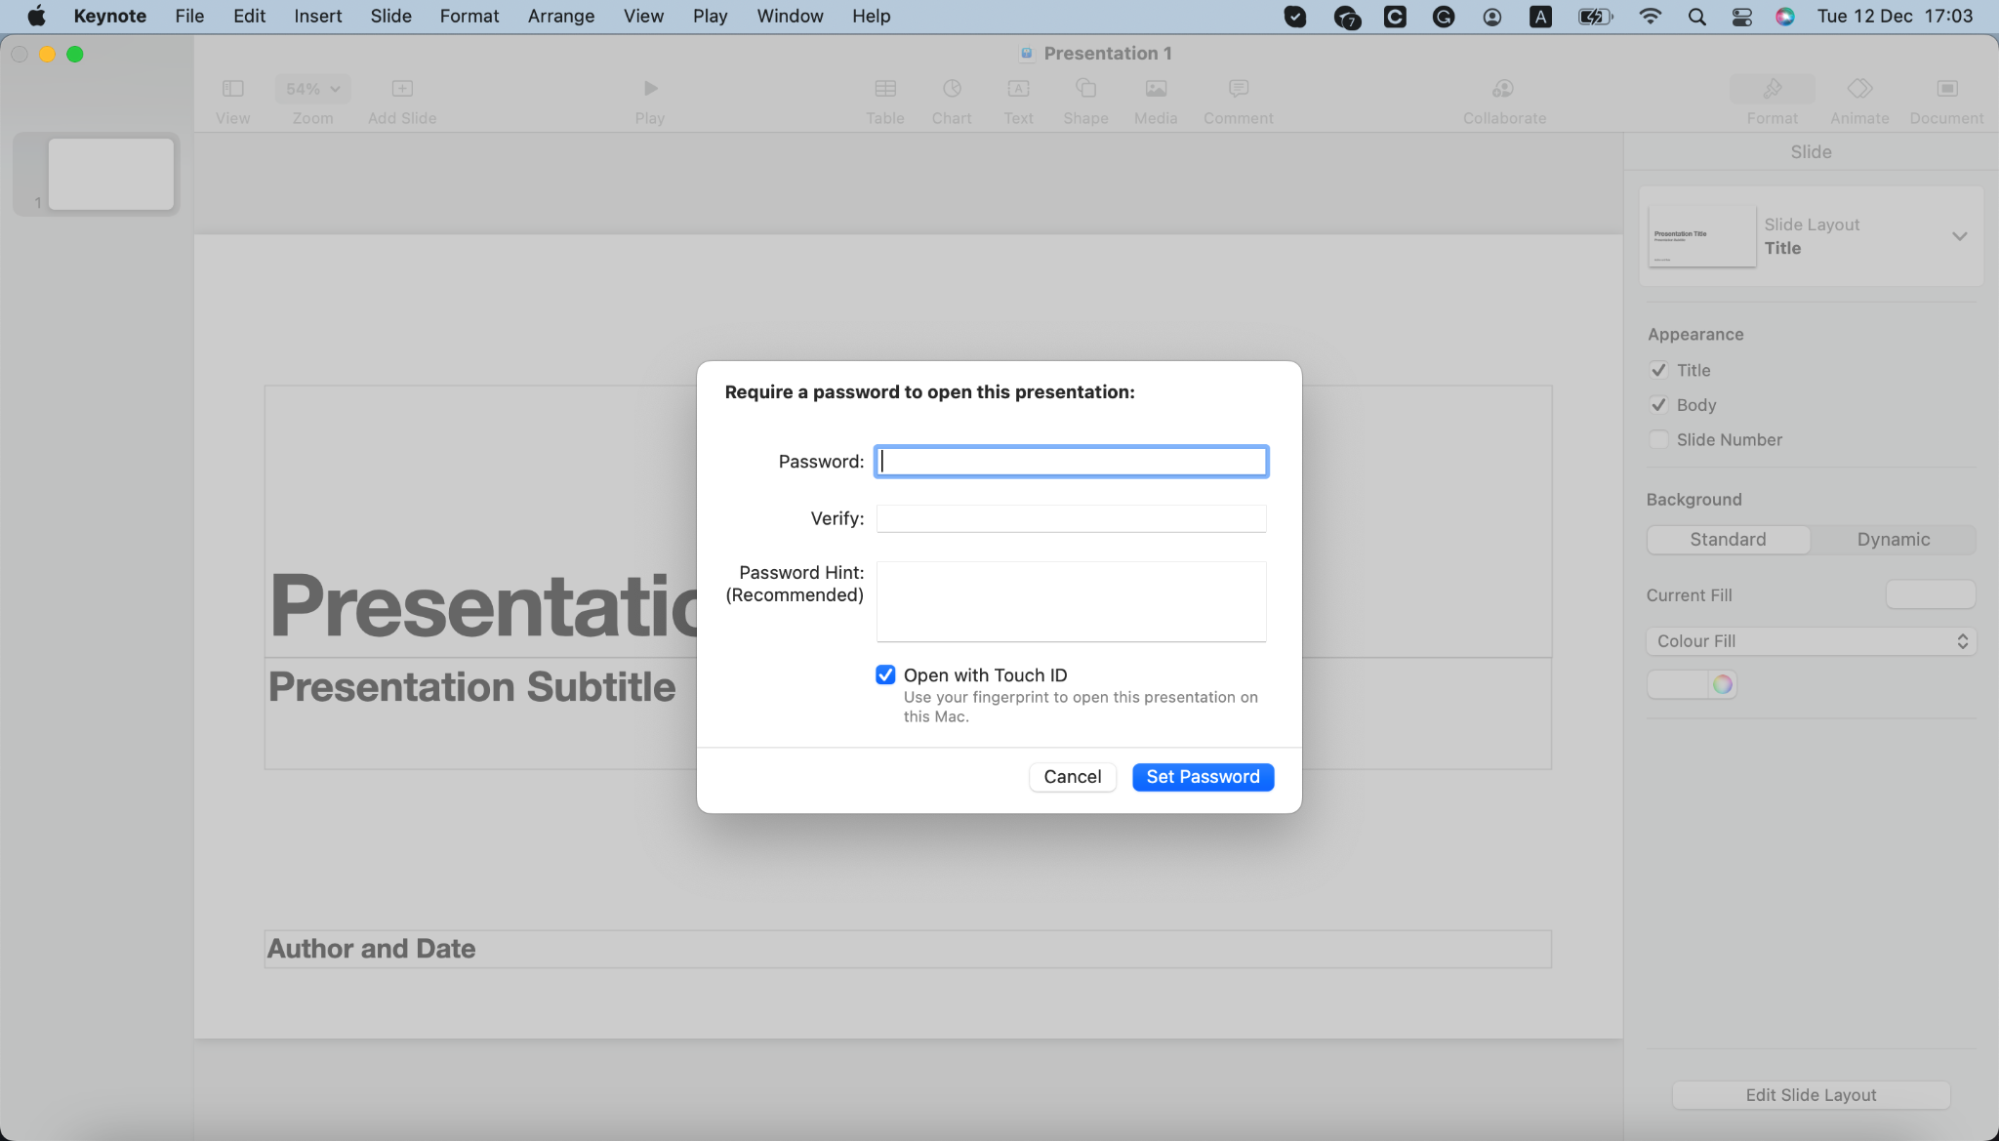
You can use a similar method to password-protect Microsoft Office documents. First, open your doc in Word, Excel, or PowerPoint, then follow these steps:
- Click the Review tab at the top of the screen.
- Select Protect, then click Protect Document.
- Set a password for opening your document, then click OK.
How to password-protect a PDF on Mac
When we work with sensitive documents, they are often in the form of a PDF, so knowing how to password-protect a PDF on Mac can be incredibly useful. Fortunately, it’s just as simple as protecting other file types—just follow these steps:
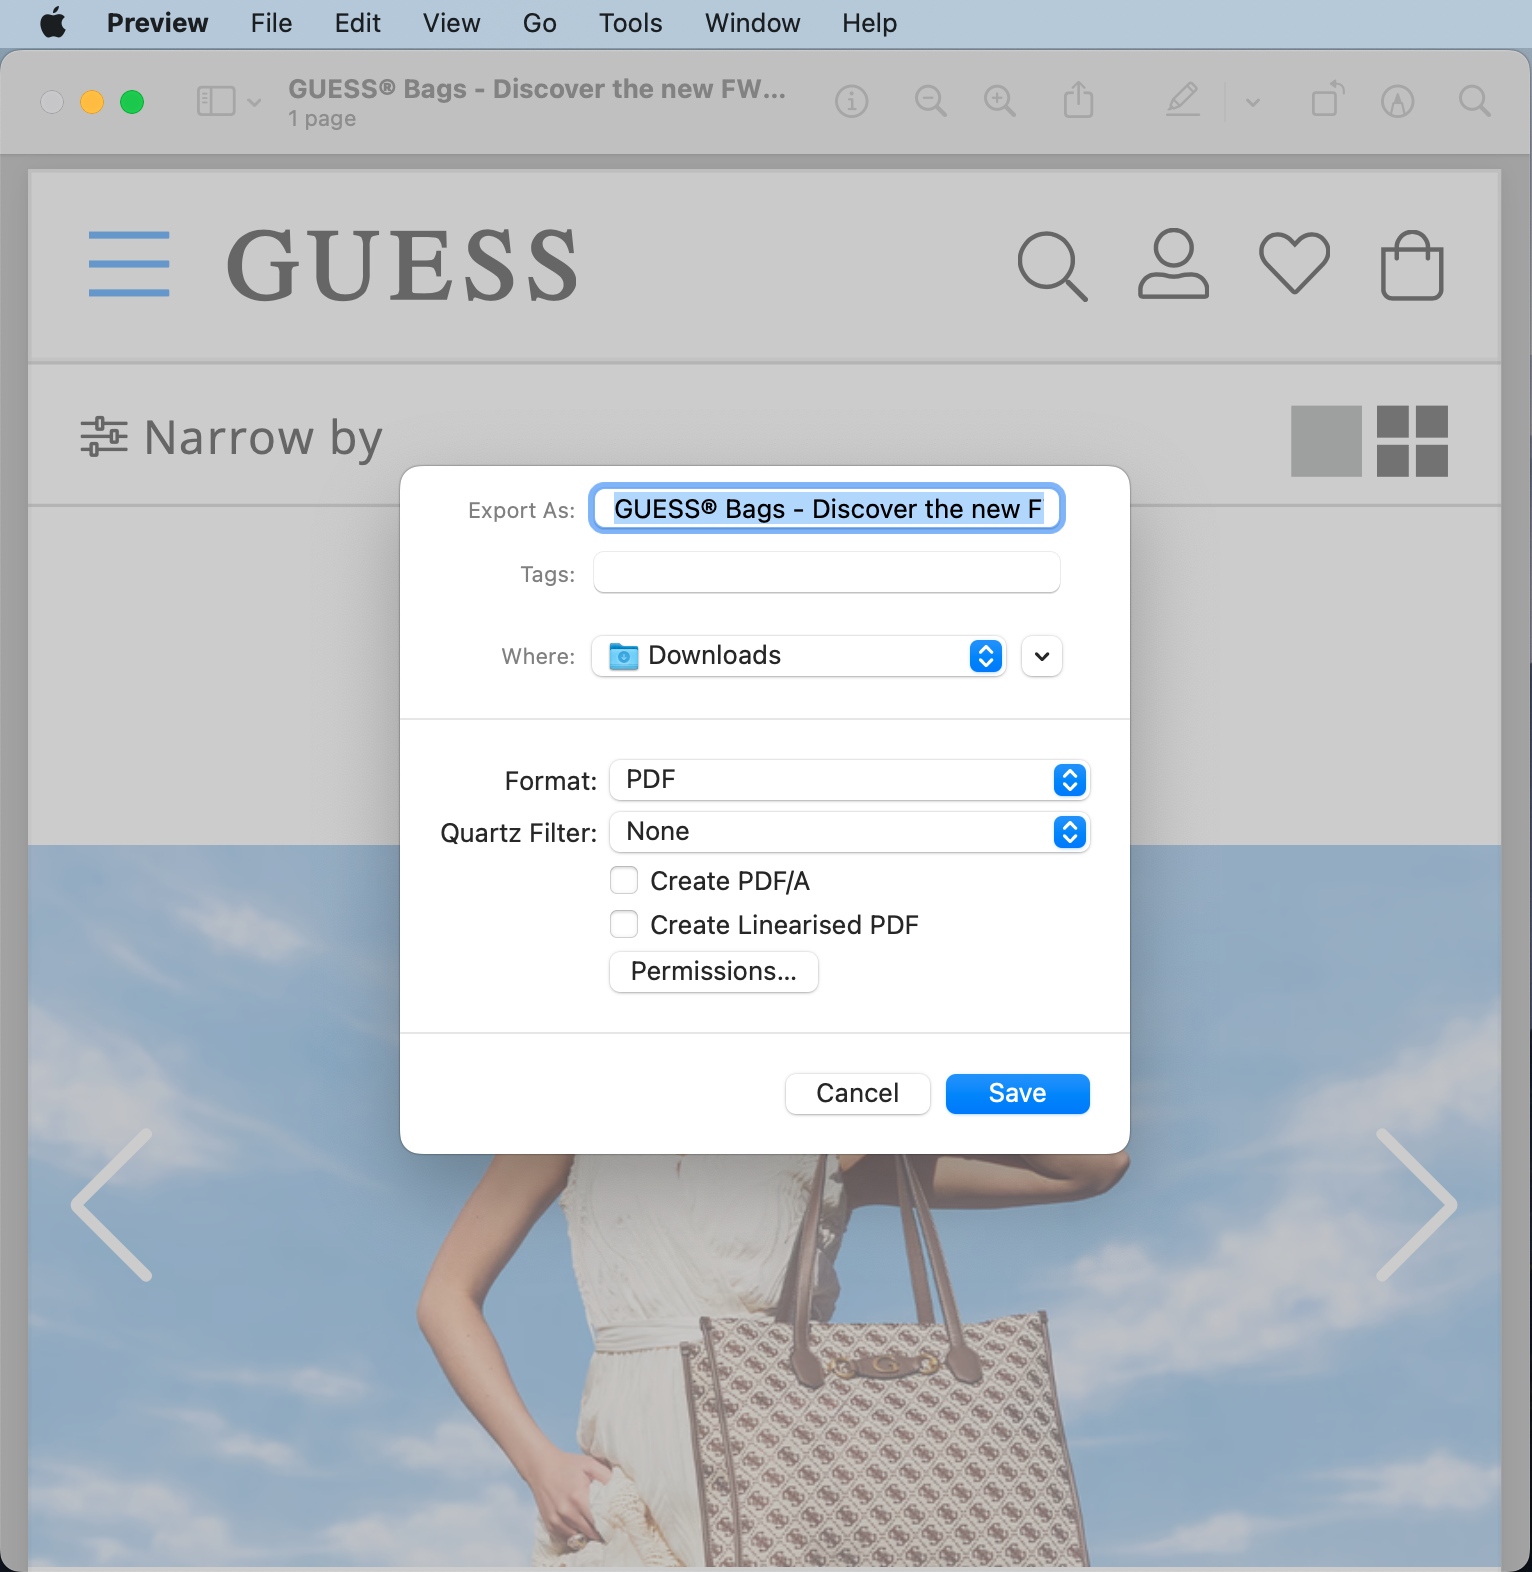
- Open the PDF file in Preview.
- In the menu bar, click File, then Export.
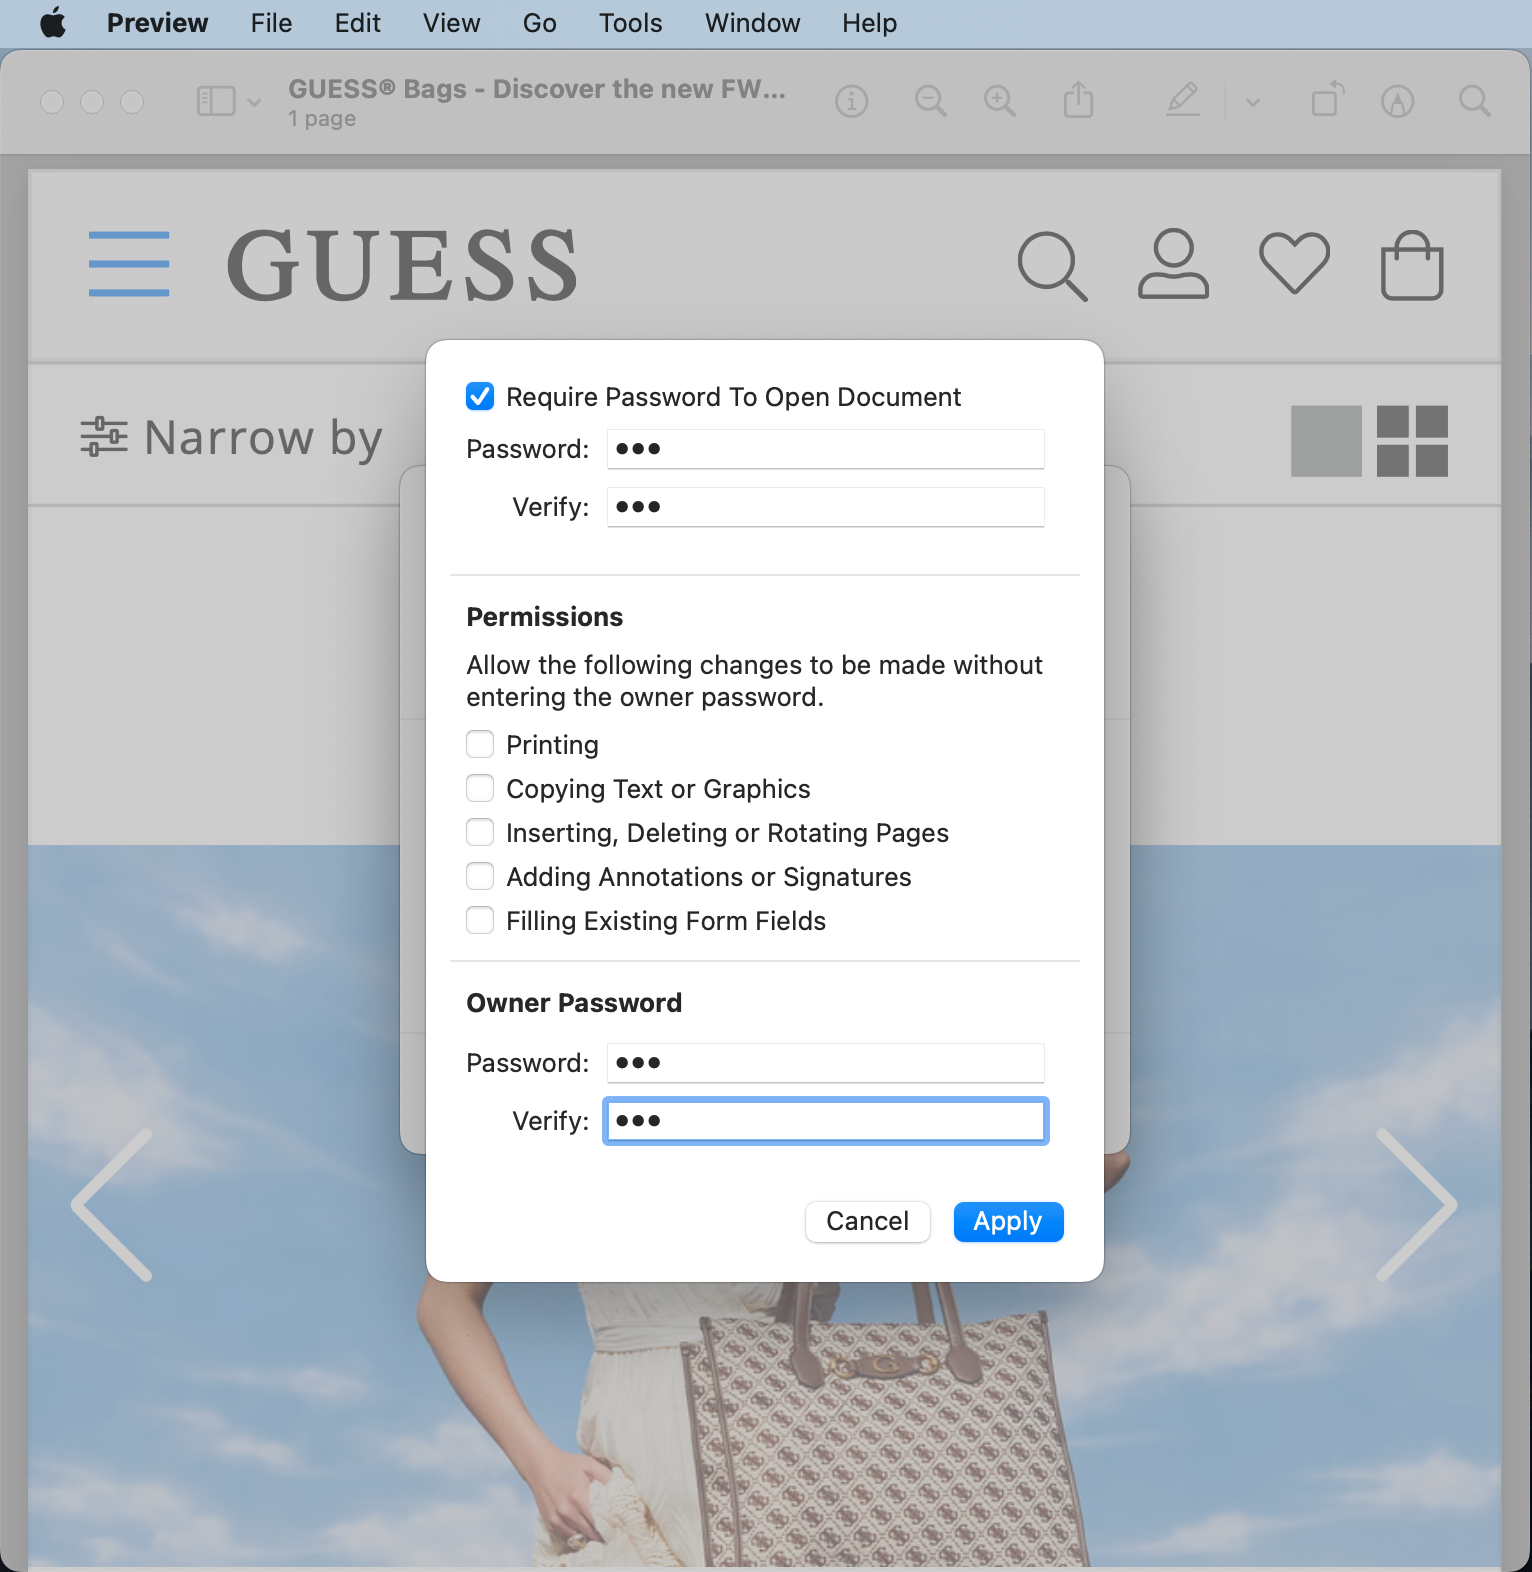
- Click the Permissions button.
- Check the box next to Require Password to Open Document.
- Enter your password, verify it, and click Apply.
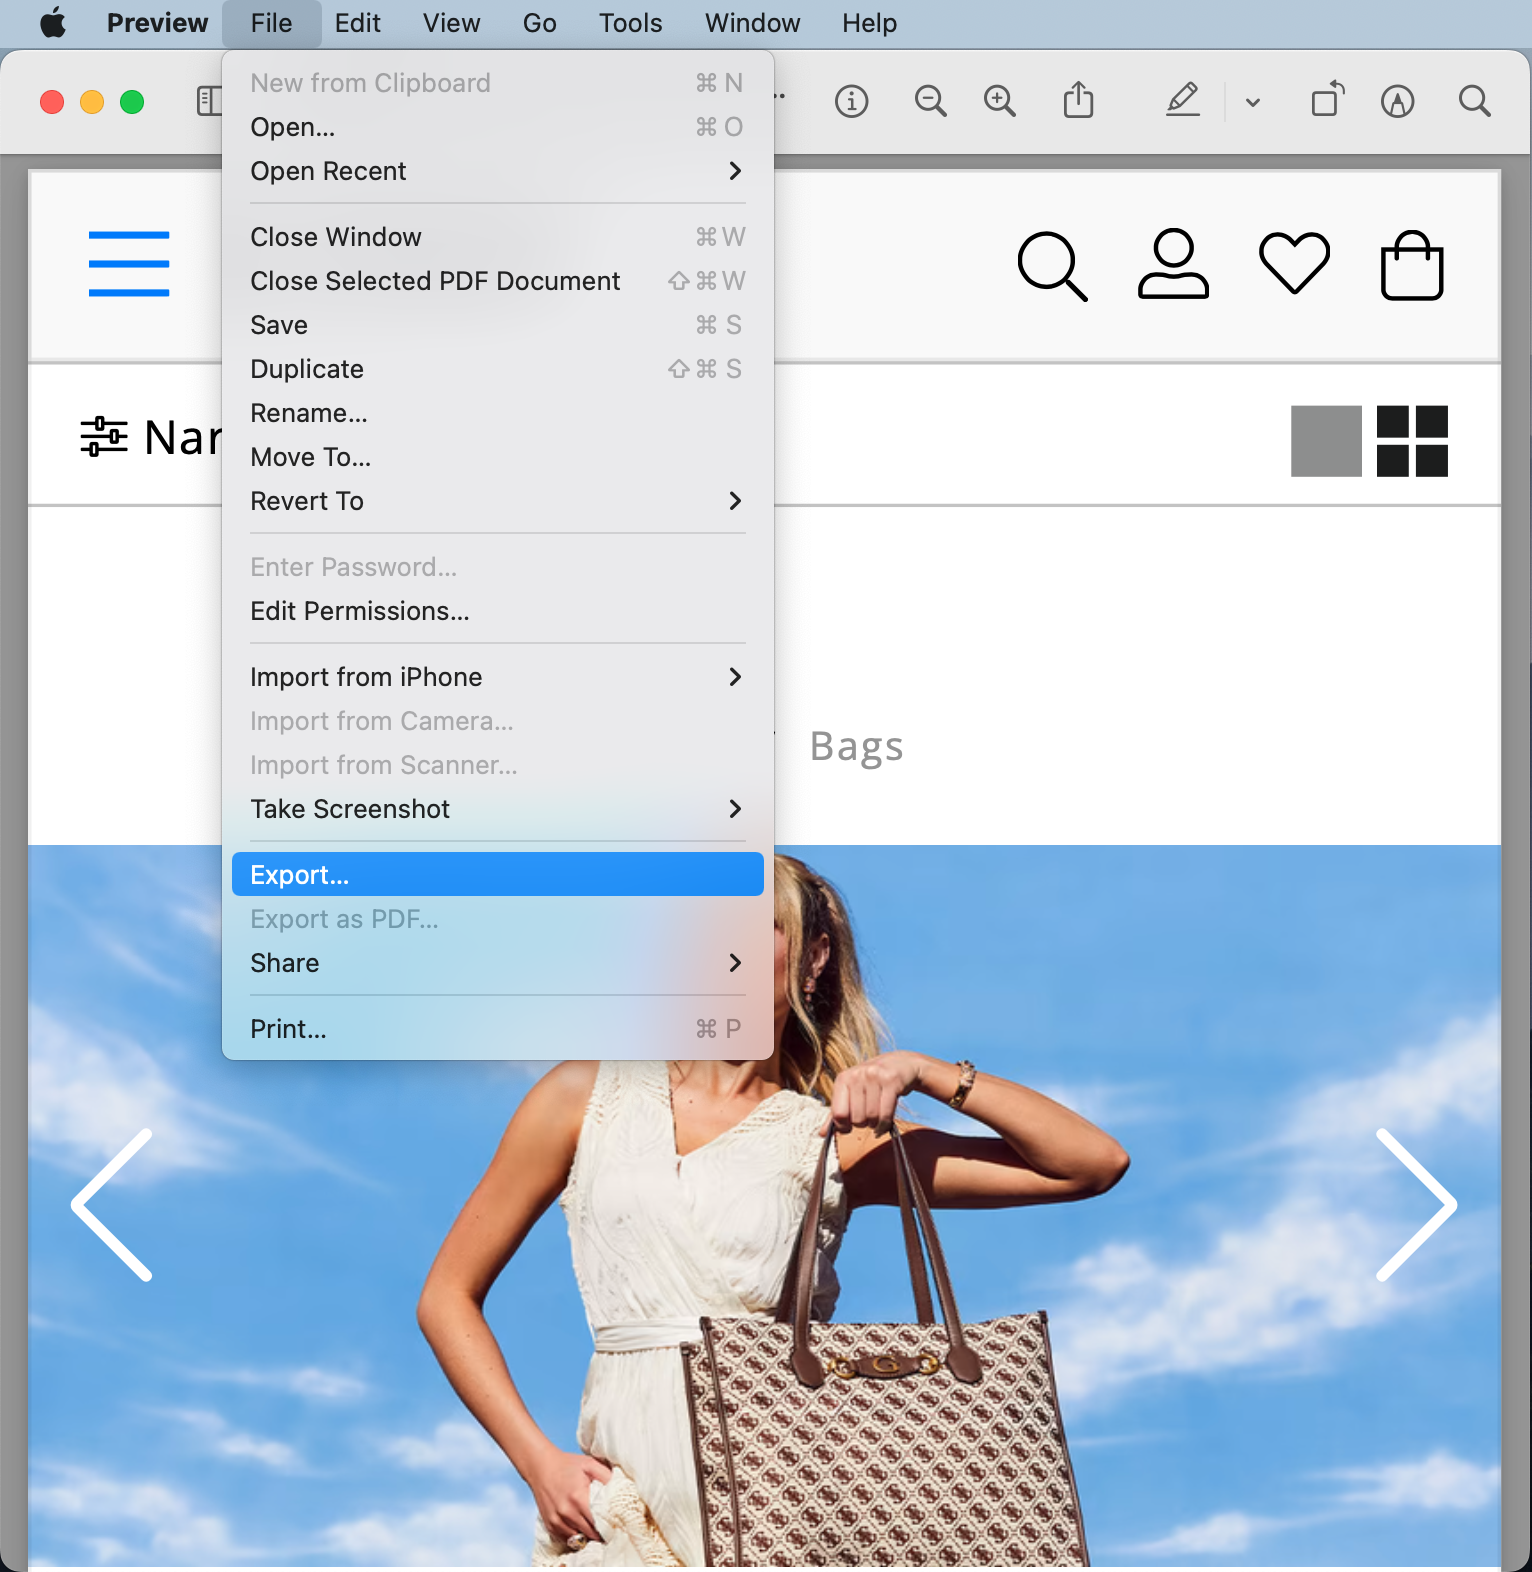
Remember
Your original PDF file that is not password-protected still exists, so once you have confirmed that the new password-protected version has been saved successfully, delete the old one so that it cannot be viewed by someone else.
How to lock a Mac Note
The Notes app in more recent macOS versions allows you to easily protect your most sensitive notes. Here’s how:
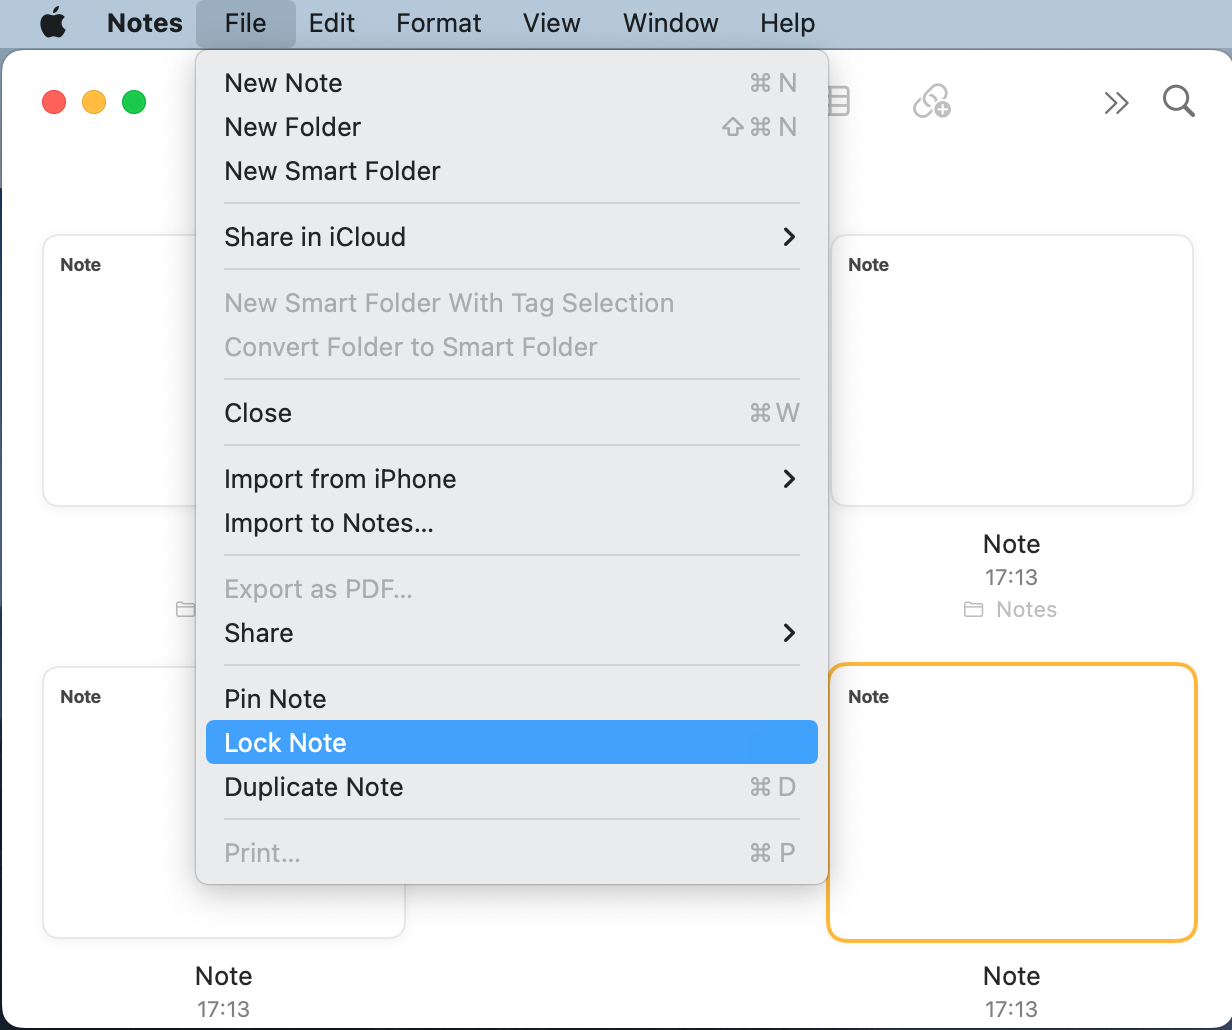
- Open the Notes app and select a note you want to lock.
- In the menu bar, click File, then select Lock Note.
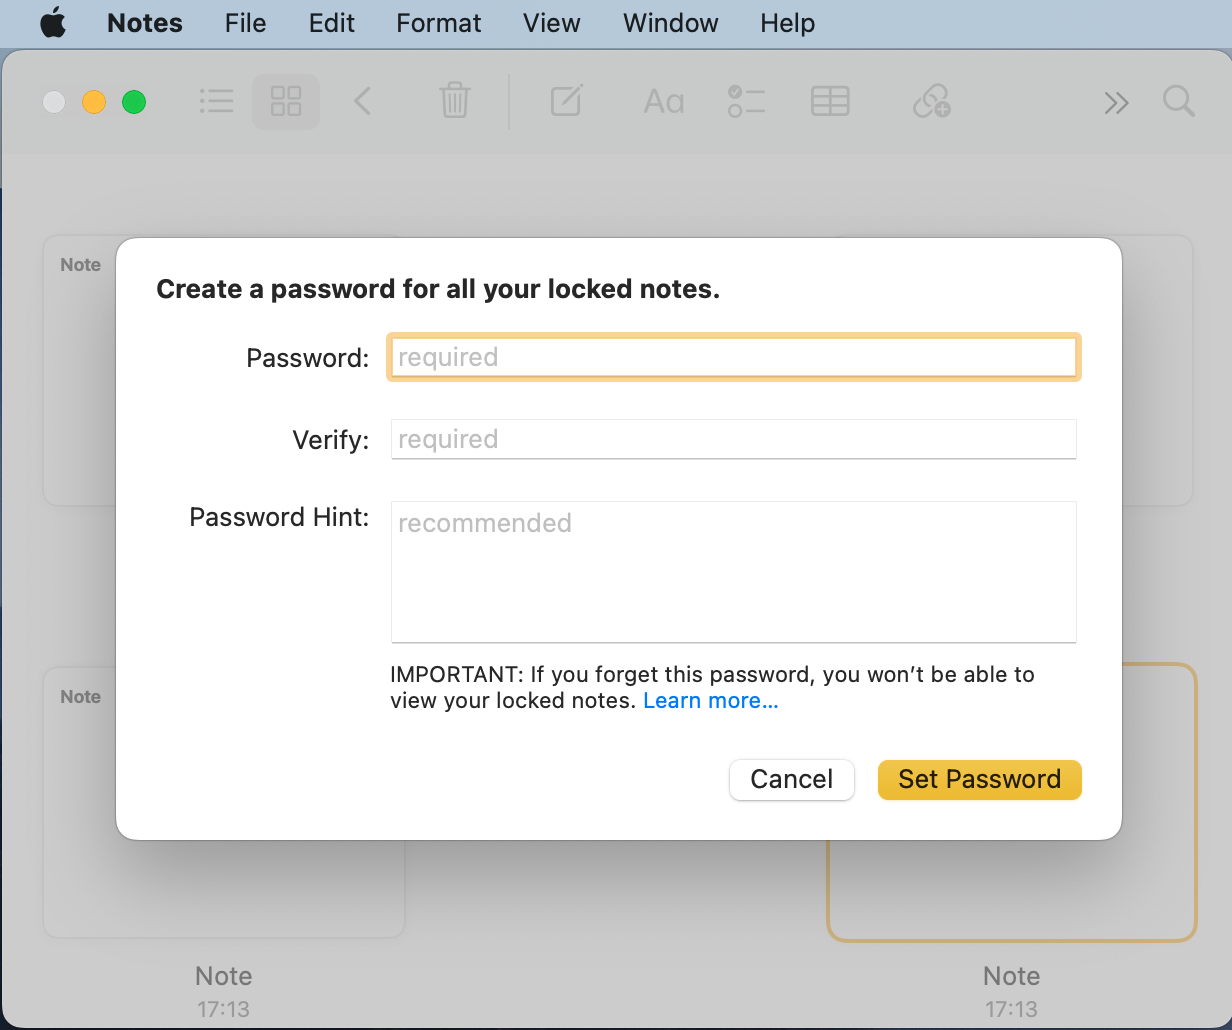
- Select Use Login Password or click Not Now if you want to use a different password.
- If you selected Not Now, set your password, then click OK.
How to password-protect JPG on Mac
The simplest way to password-protect JPG or JPEG photos on MacBook is first to convert them to a PDF and then lock them. You can do all this with the Preview app built into macOS:
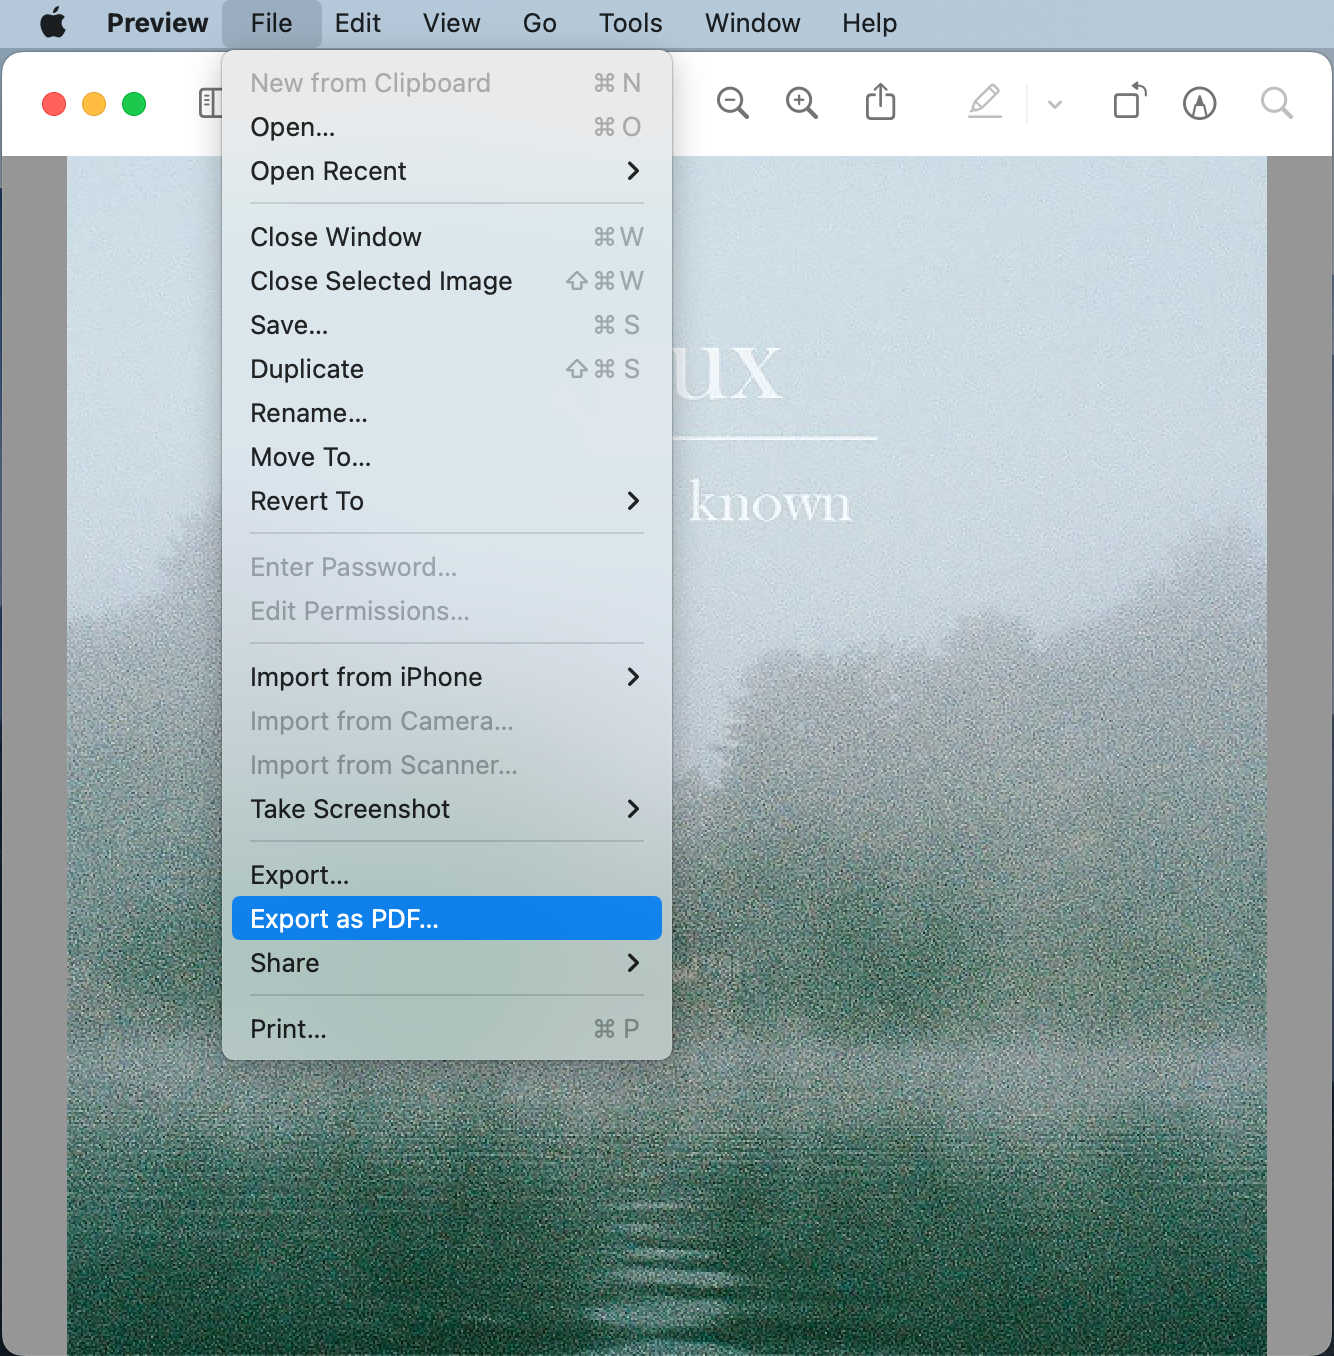
- Open your JPG file in Preview.
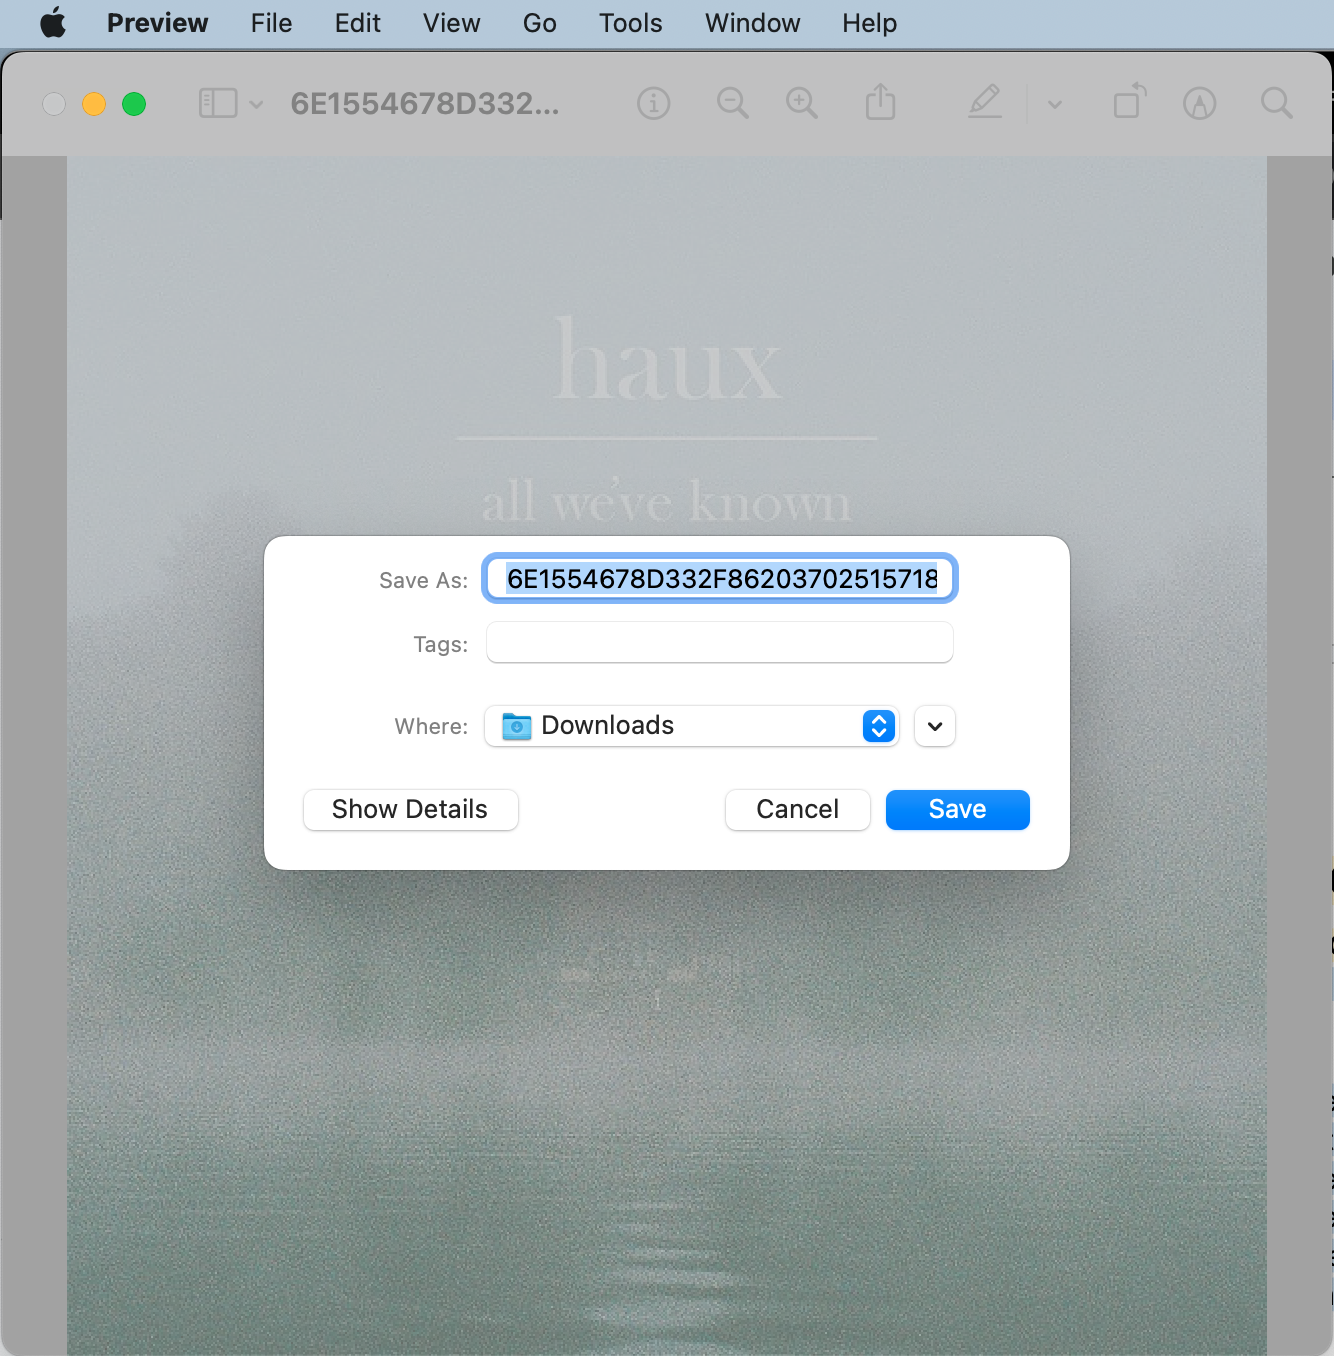
- In the menu bar, click File, then select Export as PDF.
- Give your file a name, then save it.
- Open the new PDF you just created in Preview.
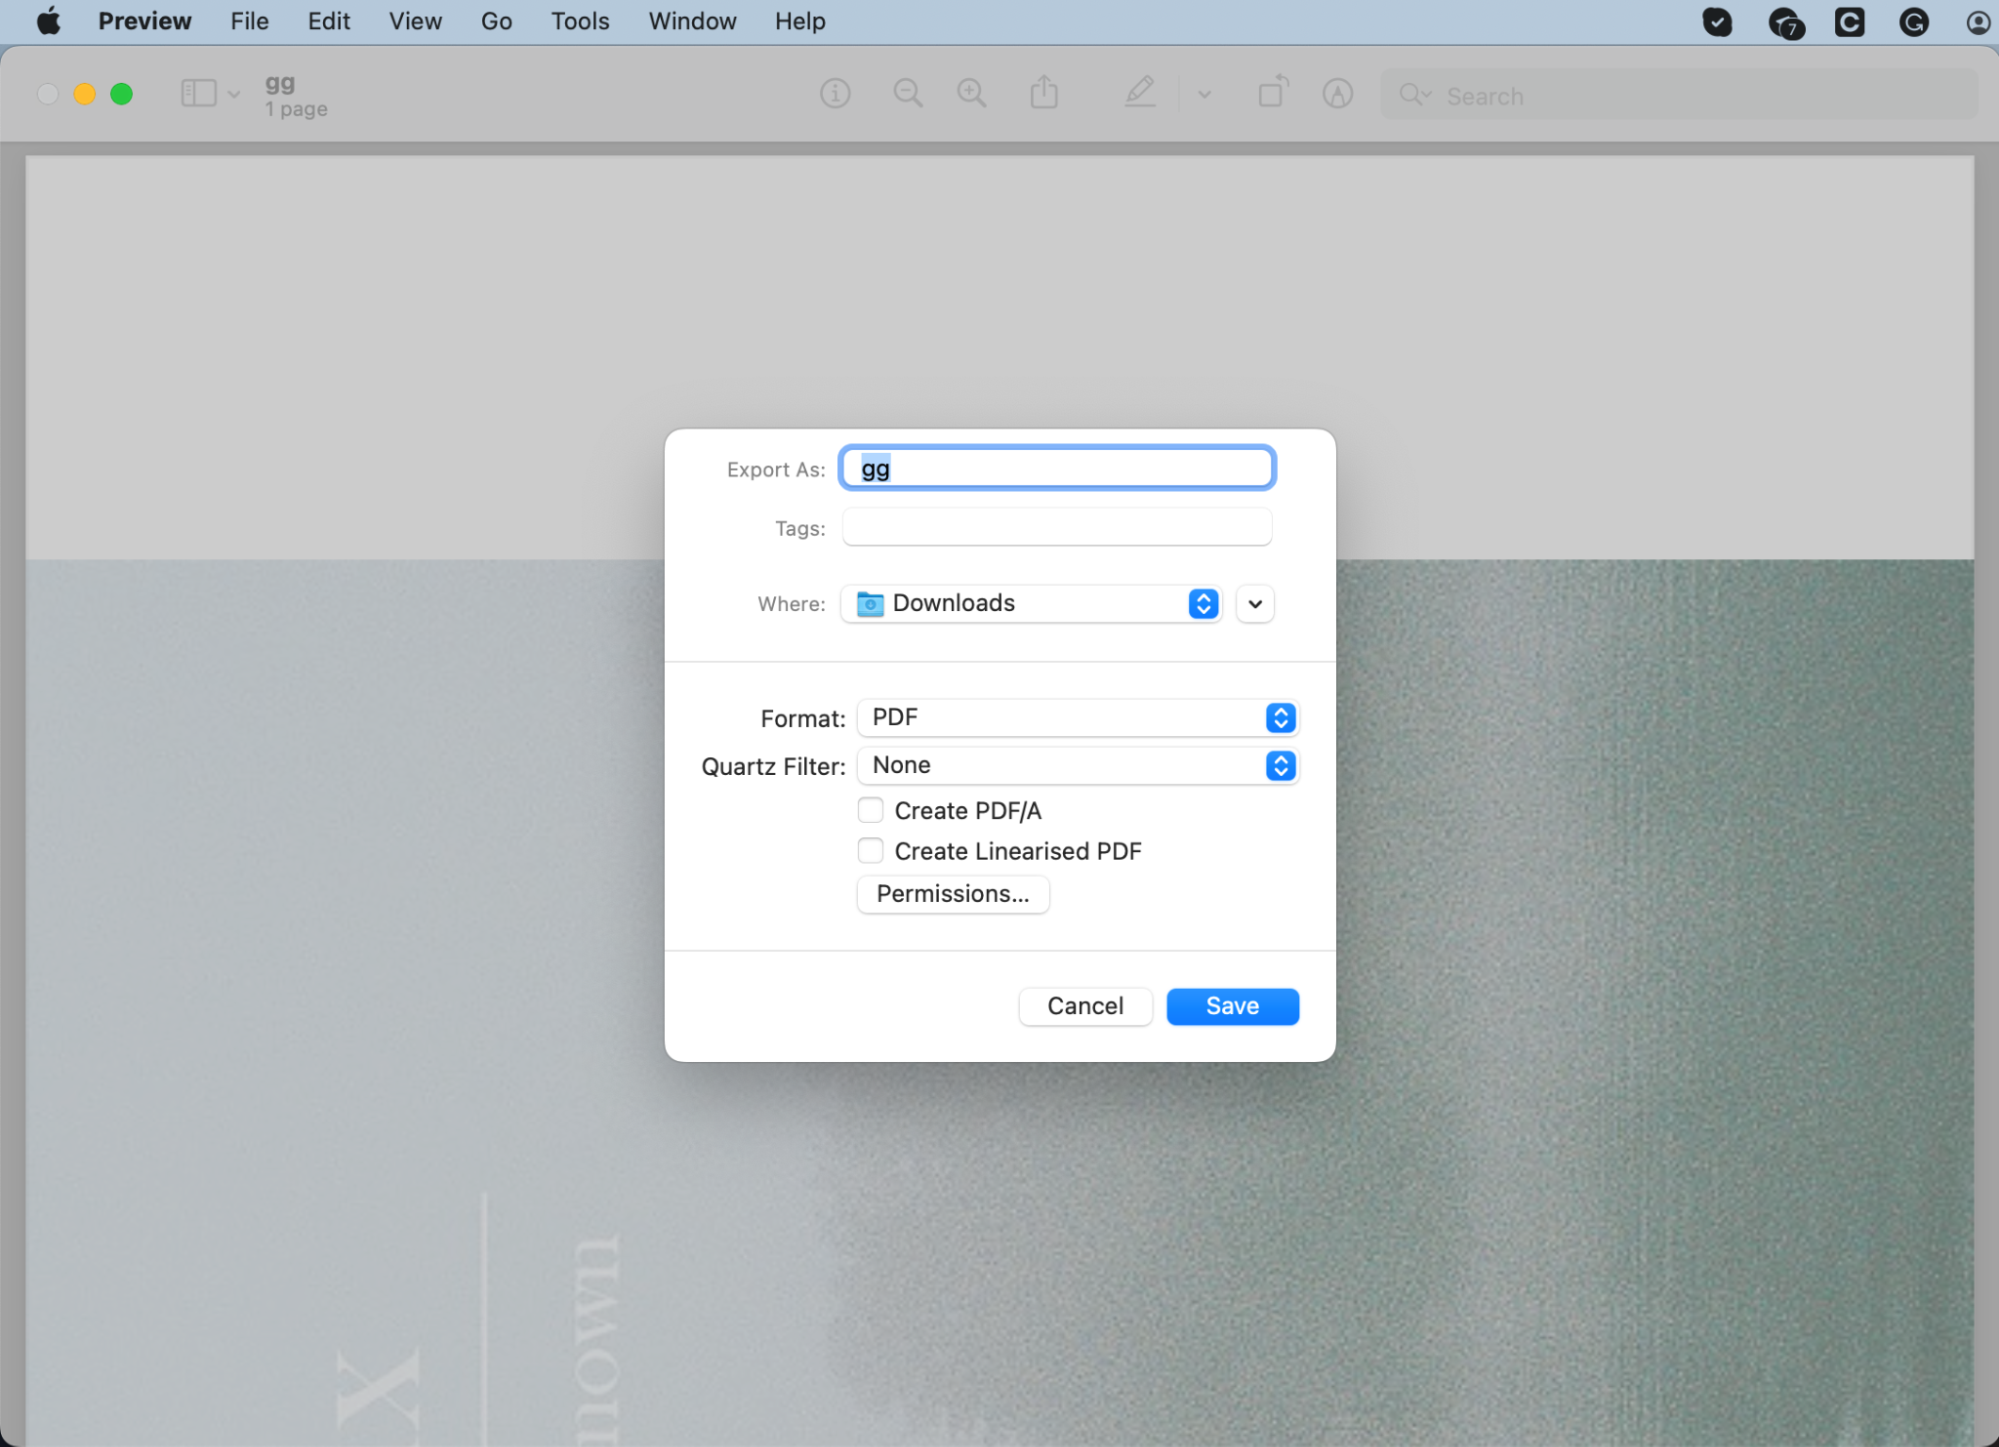
- In the menu bar, click File, then select Export.
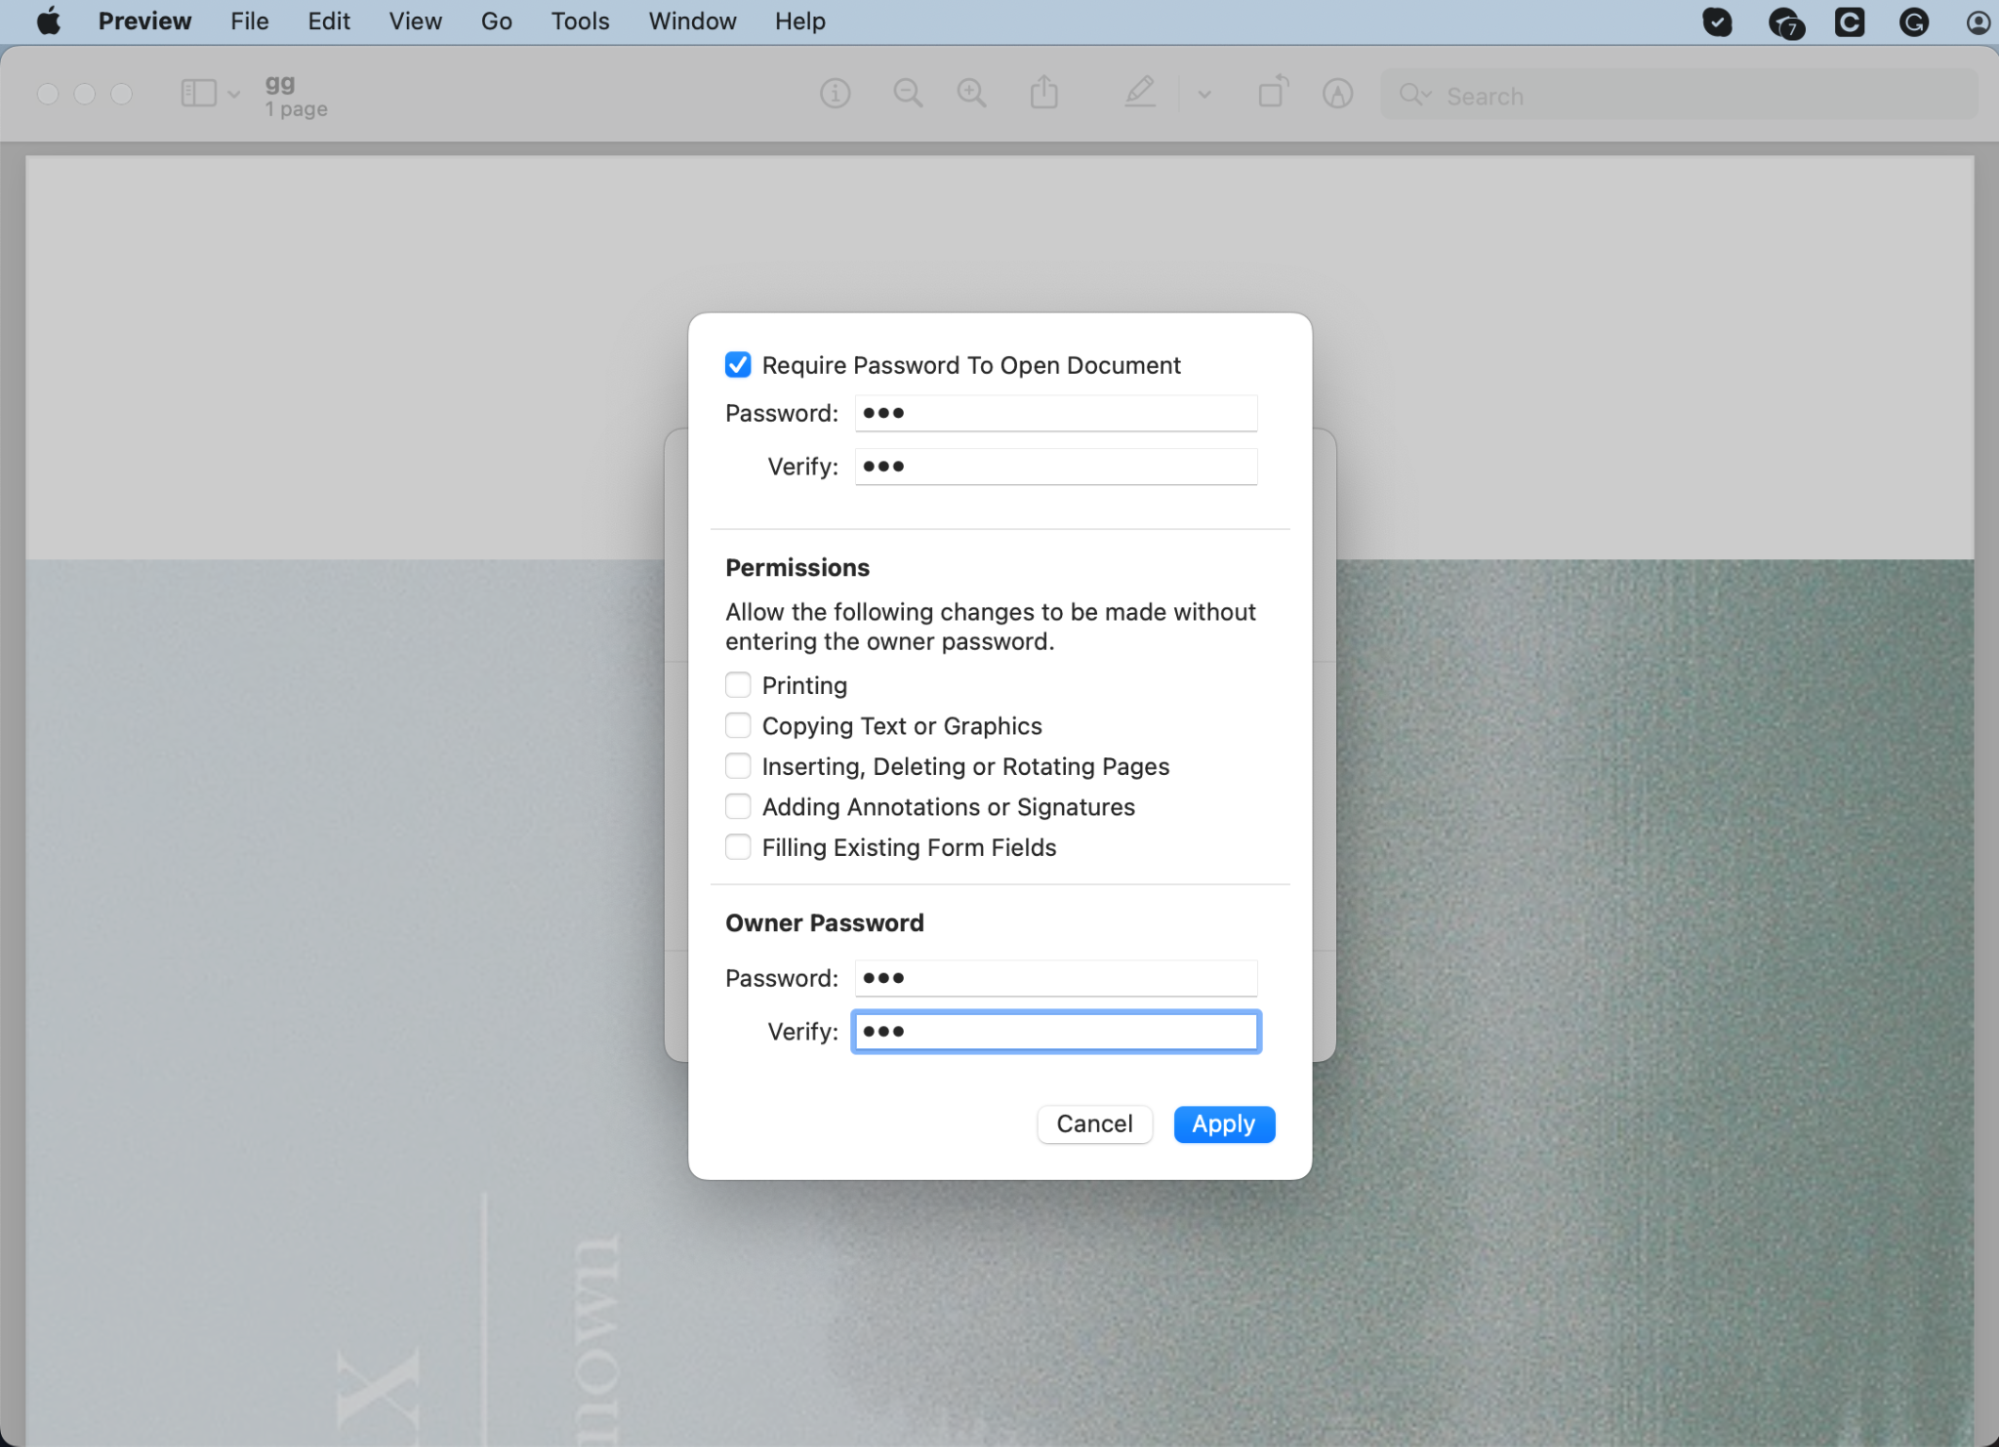
- Click Permissions, then check the box next to Require Password to Open Document.
- Enter and verify your password, then click Apply.
Remember
Your original JPG file and the non-protected PDF you created are still saved on your Macintosh. Once you have confirmed that the password-protected version is fine, be sure to delete the original JPG and the non-protected PDF so they can’t be opened.
How to encrypt Mac hard drive
You may already know how encryption protects data, in which case you’ll likely want to use it to keep your most sensitive files out of the reach of others. Using FileVault, you can encrypt a Mac’s hard drive and protect everything it holds.
Here’s how to password-protect a hard drive on your Mac:
- Click the Apple icon in the menu bar, then select System Preferences.
- Select Privacy & Security, then click FileVault.
- Click Turn On to enable FileVault, then enter your Mac’s password.
- Choose the preferred method of unlocking your disk if you lose your password (iCloud account or recovery key).
- Click Continue, then wait for FileVault to encrypt files on Mac.
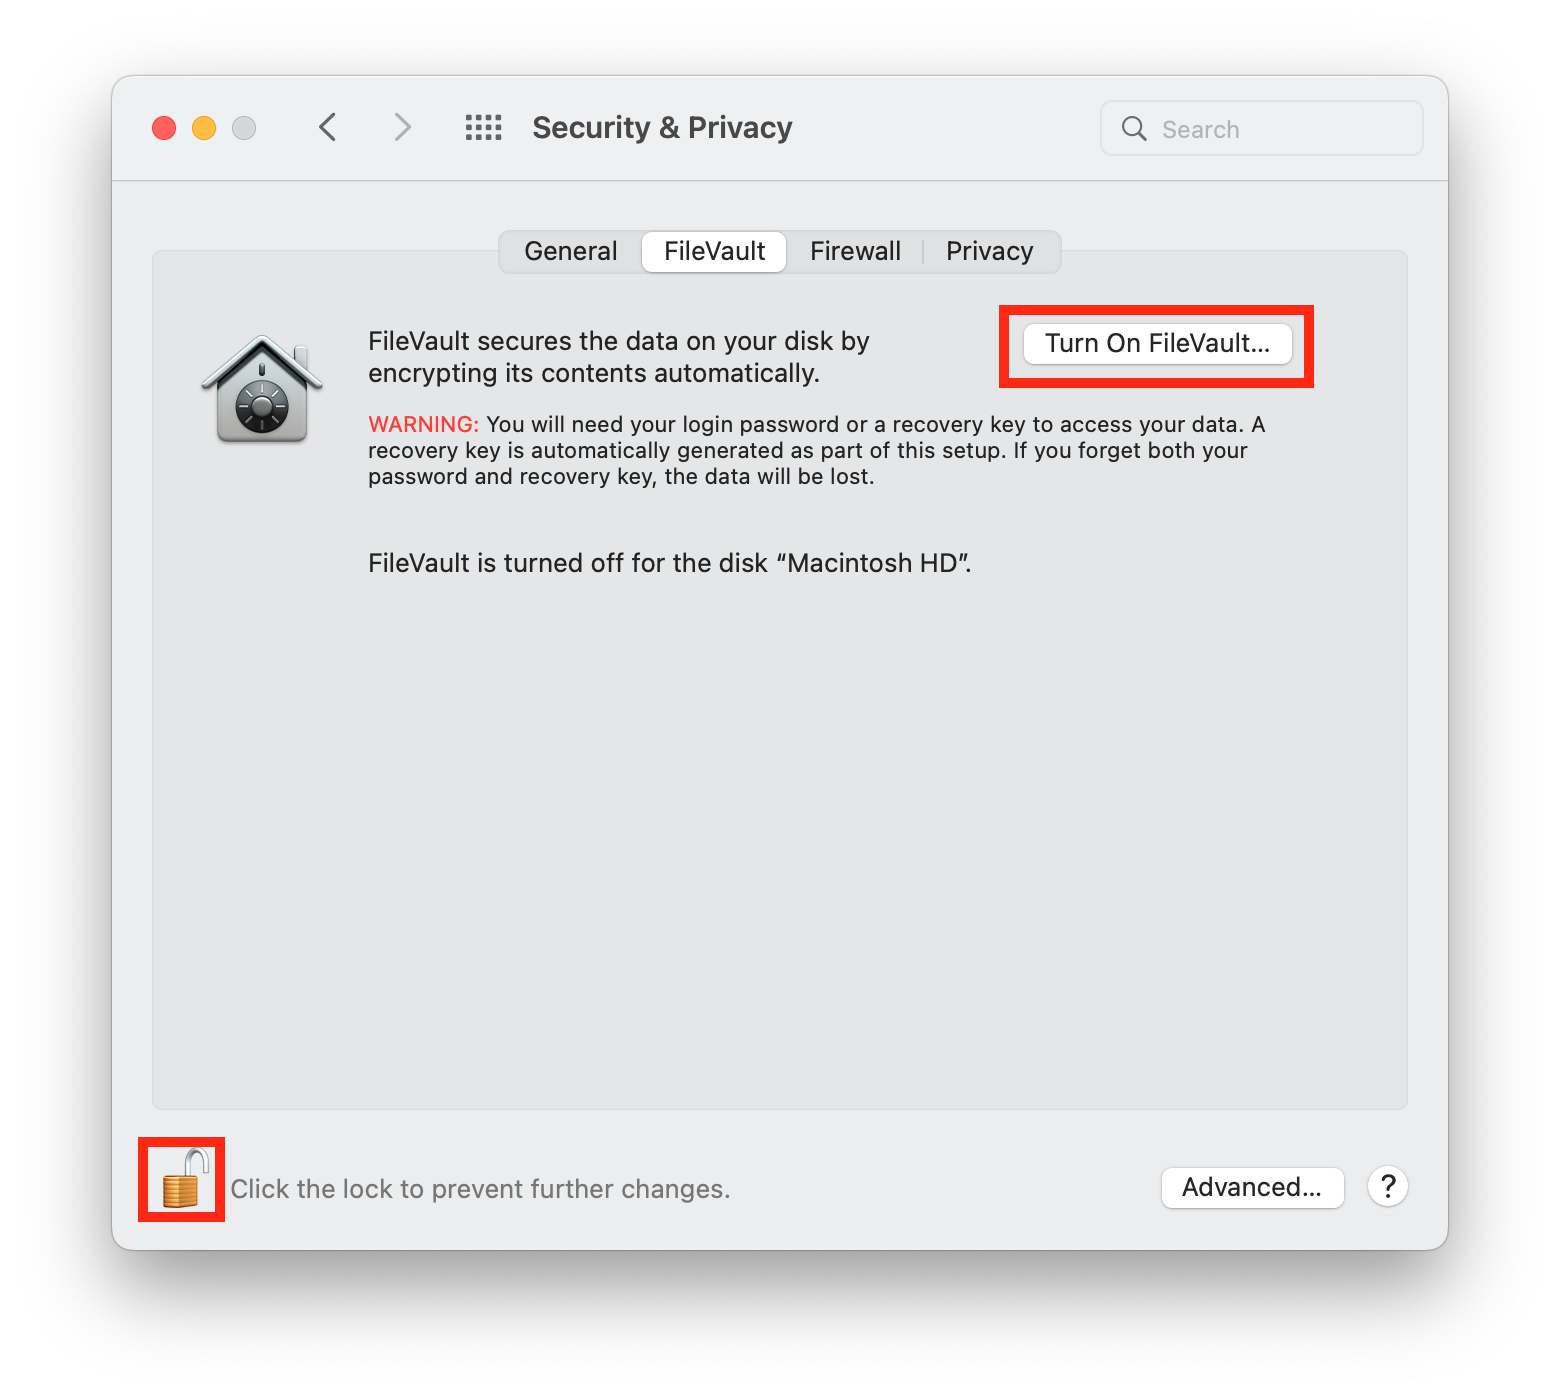
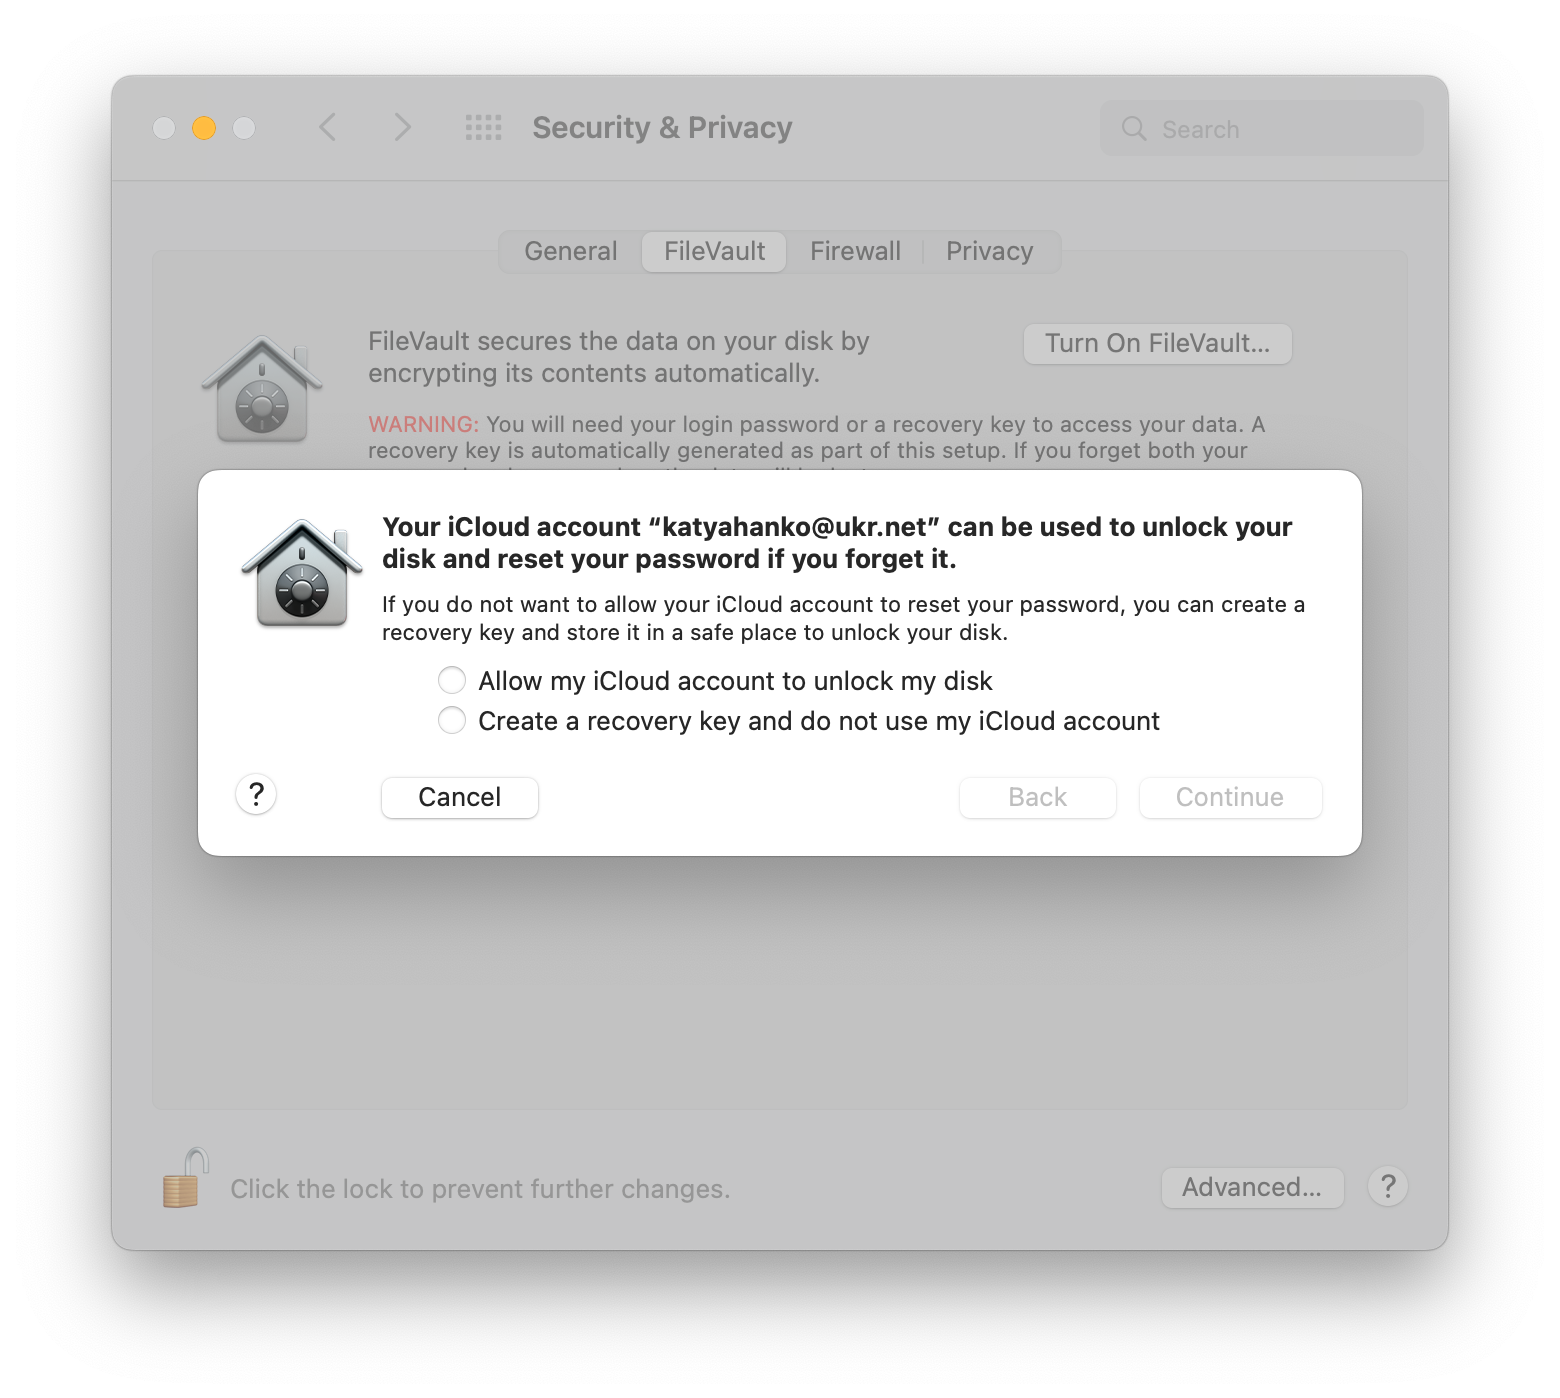
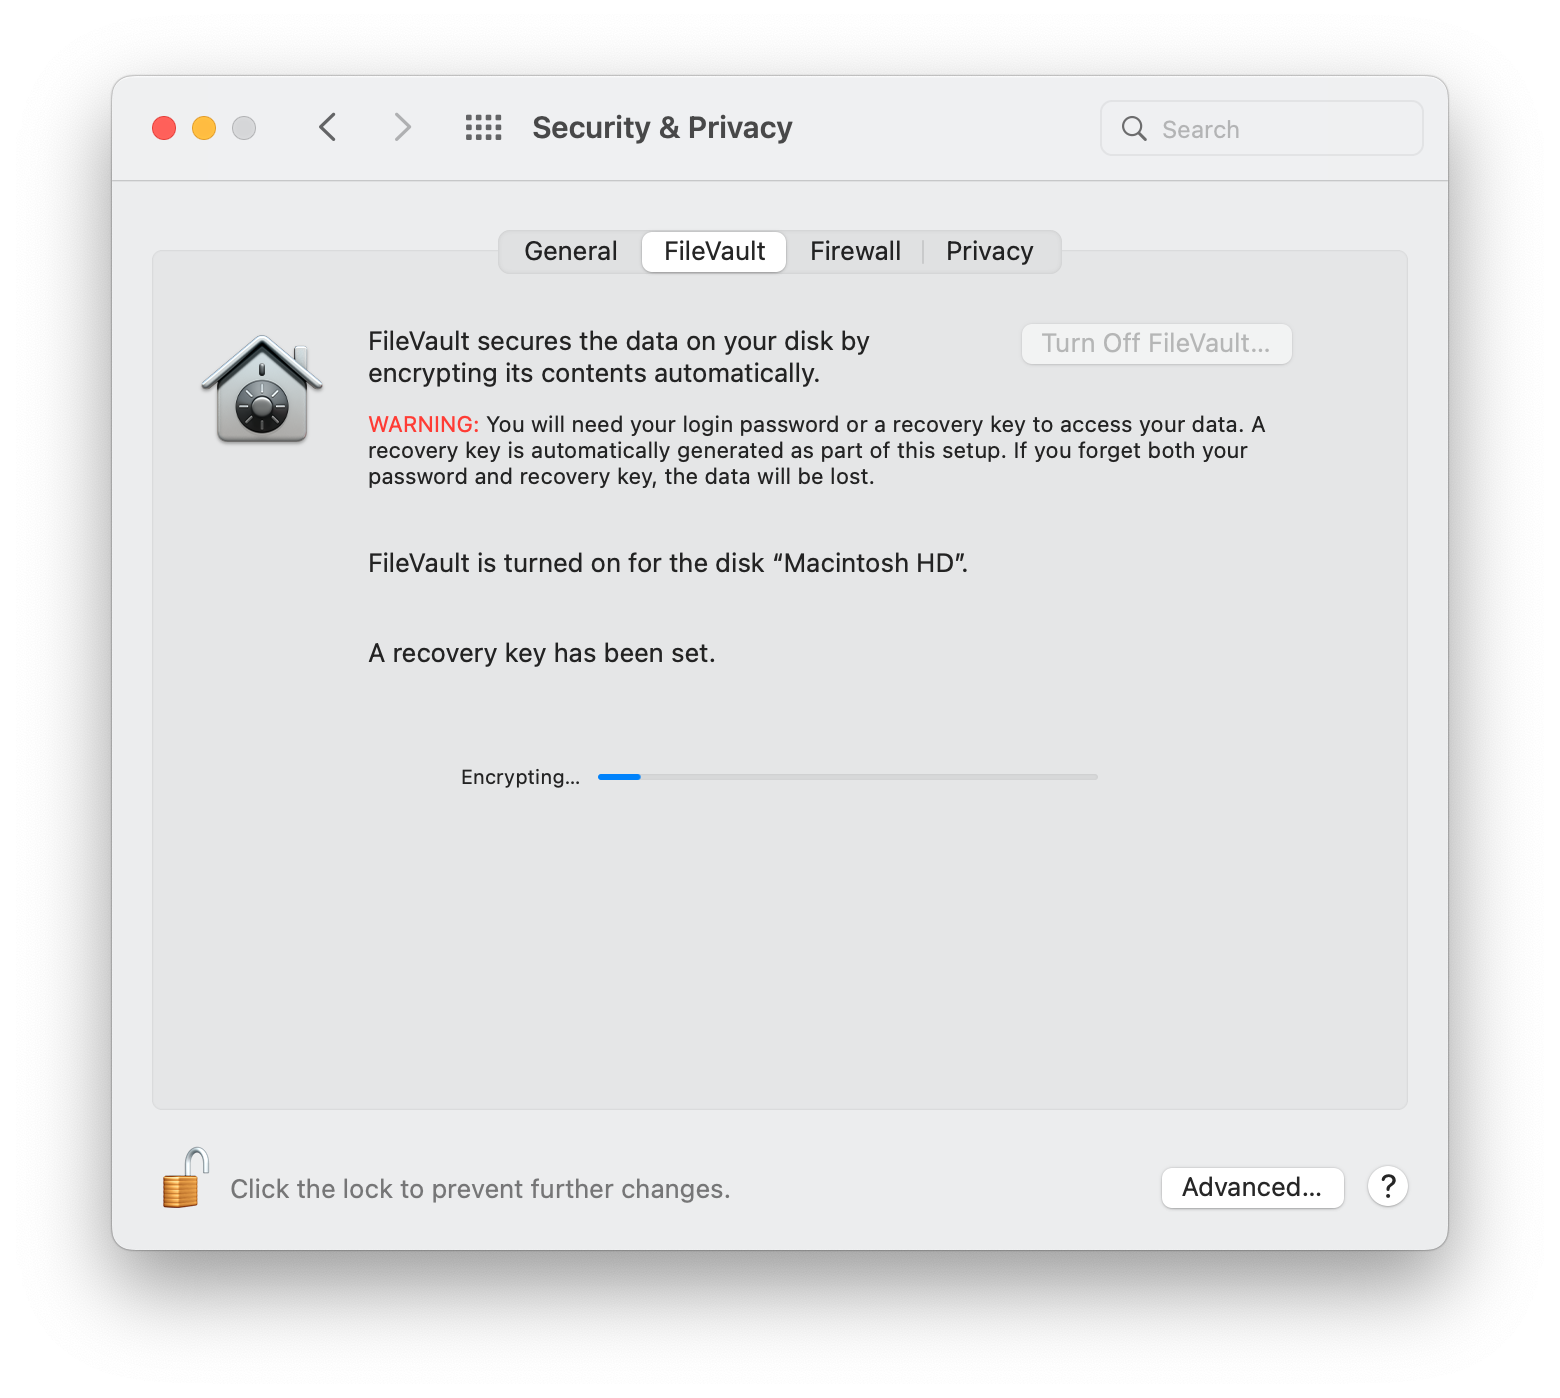
Once your Mac encrypts your HDD, expect things to run slower than usual for a little while. After that, everything will return to normal. If you choose to use the recovery key option, be sure to store the key somewhere safe.
Remember
If you lose the recovery key, decrypting your hard drive and accessing its data later will be impossible.
Now, locking down your Mac is a smart move, but what about your phone?
If your iPhone has been jailbroken without your knowledge, it could be vulnerable to tracking apps and spyware, even if your Mac files are locked up.
Clario Anti Spy helps you stay ahead of these threats with Device System Check. This tool scans your iPhone to detect jailbreaks and outdated software that could put your data at risk, then shows you how to resolve these issues before they escalate.
Follow these steps to use Clario Anti Spy’s Device system check:
- Open Clario Anti Spy on your iPhone.
- Select Device system check from the main menu.
- Tap Scan to check for jailbreaks and outdated software.
- Follow the recommendations to fix any security issues.
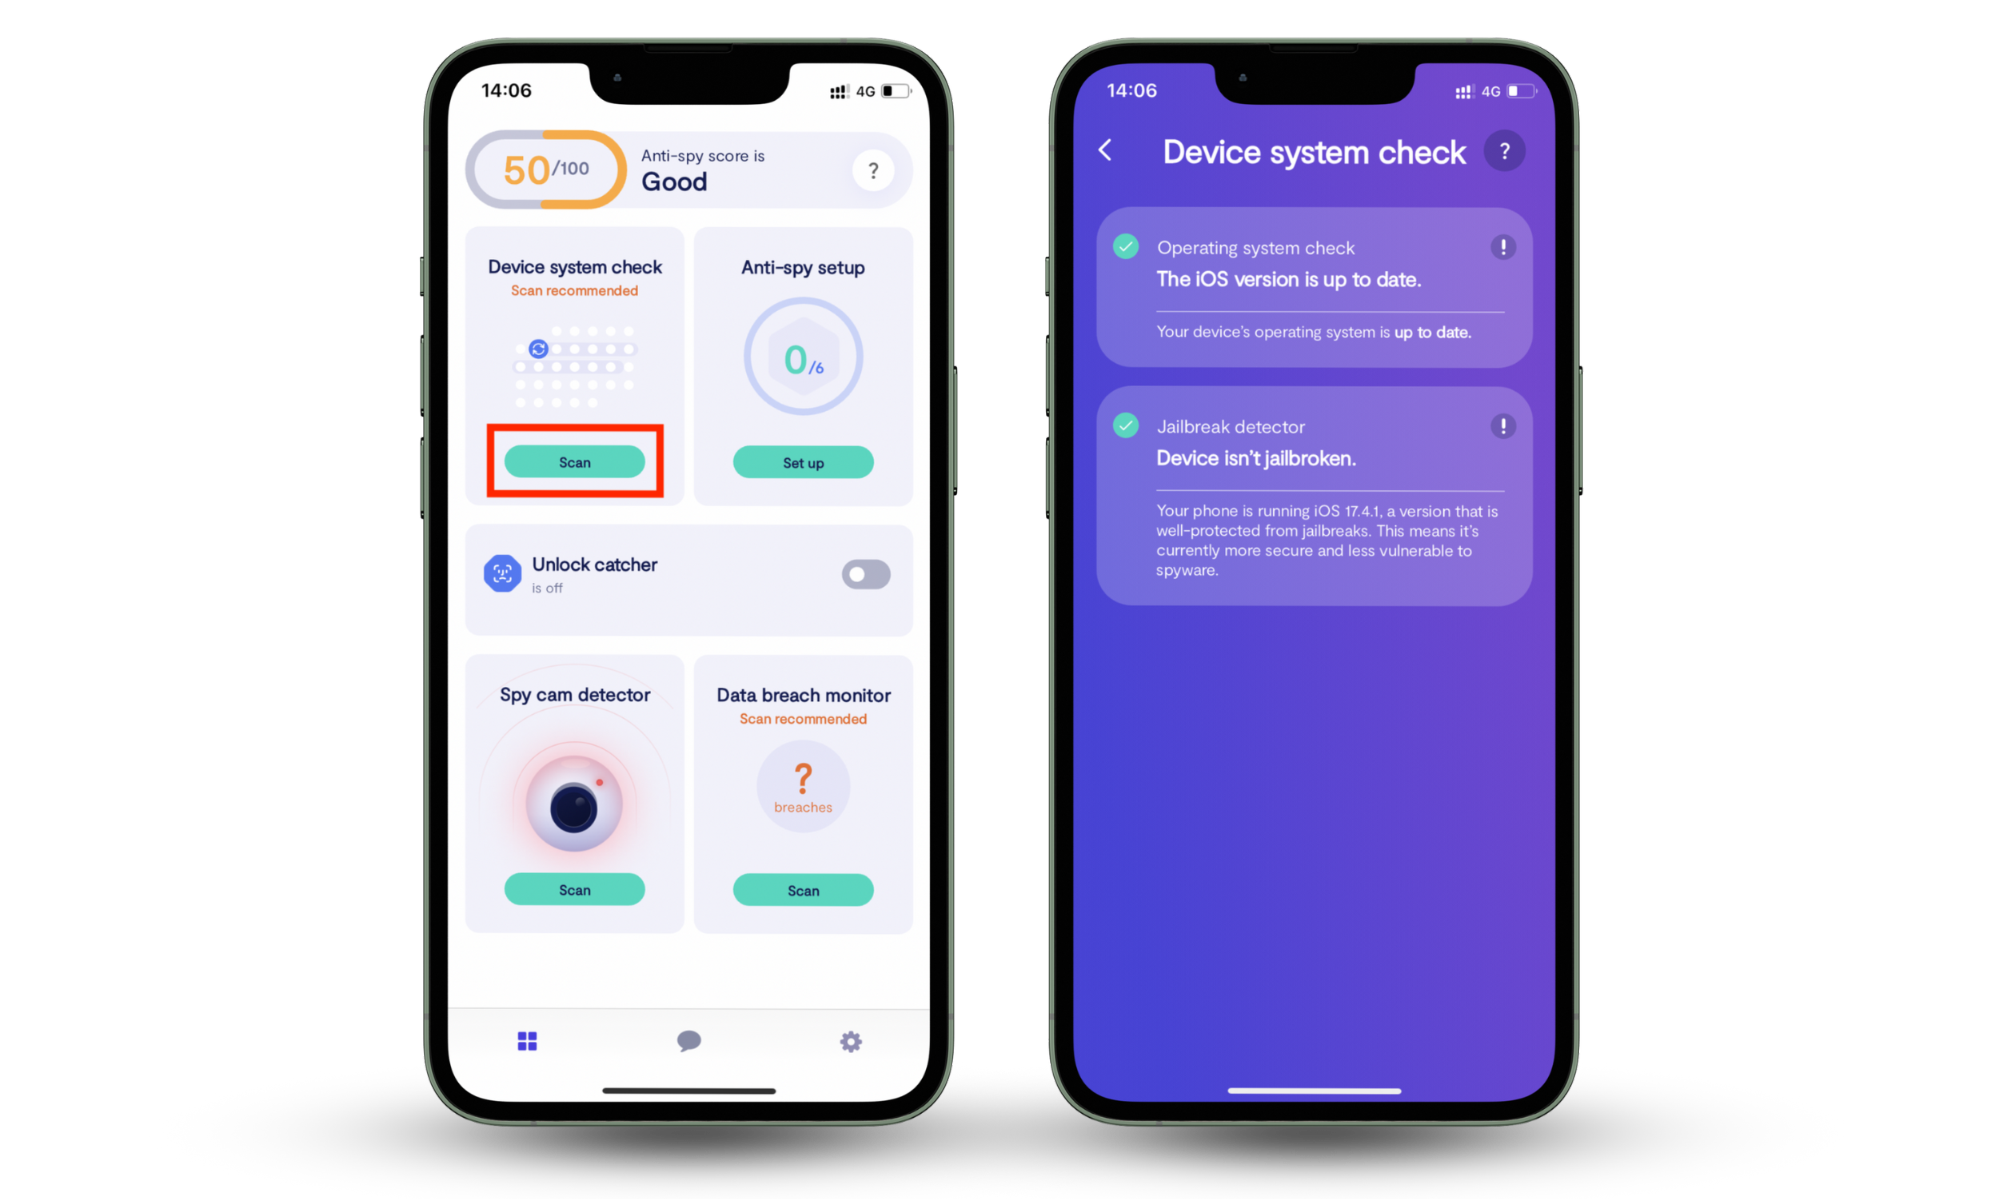
Good! Your phone is secure. Let’s get back to fortifying you Mac.
How to encrypt external hard drive on Mac
If you use removable storage devices for keeping sensitive data, they must also be encrypted. Unfortunately, FileVault can’t password-protect your Mac's external drives, but you can use Finder or Disk Utility instead.
Encrypt external drives using Finder
You can use Finder to encrypt a folder on your Mac that’s saved to an external disk or flash drive by following these steps:
- Connect the drive you want to encrypt to your Mac.
- Open Finder and right-click the drive from the Finder sidebar.
- Select Encrypt.
- Enter a strong password and a password hint.
- Click Encrypt Disk.
Encrypt external drives using Disk Utility
Important
Since this method requires formatting your external drive, you should only use it for new or empty drives. If you want to partition other drives, make sure you copy all the data before starting the encryption process.
- Connect the USB thumb drive, SD card, or SSD you want to encrypt to your Mac.
- Open Finder and go to Applications > Utilities > Disk Utility.
- Select the drive you want to encrypt and click Erase.
- In the pop-up window, provide a name and select Mac OS Extended (Journaled, Encrypted) from the Format drop-down list.
- Click Erase.
- Enter a strong password and a hint if you need one.
- Click Choose.
From now on, you’ll need to enter the password every time you restart your Mac and when you connect the USB stick or other portable media.
Encrypt disk images using Disk Utility
- Open Disk Utility.
- In the menu bar, select File > New Image > Blank Image.
- In the pop-up window, complete the following:
- In the Save As field, enter a name for your disk
- In the Where list, select a location for your disk
- In the Name field, enter the name that will appear when you open the image
- In the Size field, set the maximum size you want the disk image to be
- In the Format field, choose the disk format you want to use
- In the Encryption list, select an encryption level (128-bit encryption for large files or 256-bit encryption for super-secret files). Provide a strong password
- In the Image Format list, select read/write disk image.
- Finally, click Save and then Done once the operation is successfully finished.
How to encrypt your Time Machine backups
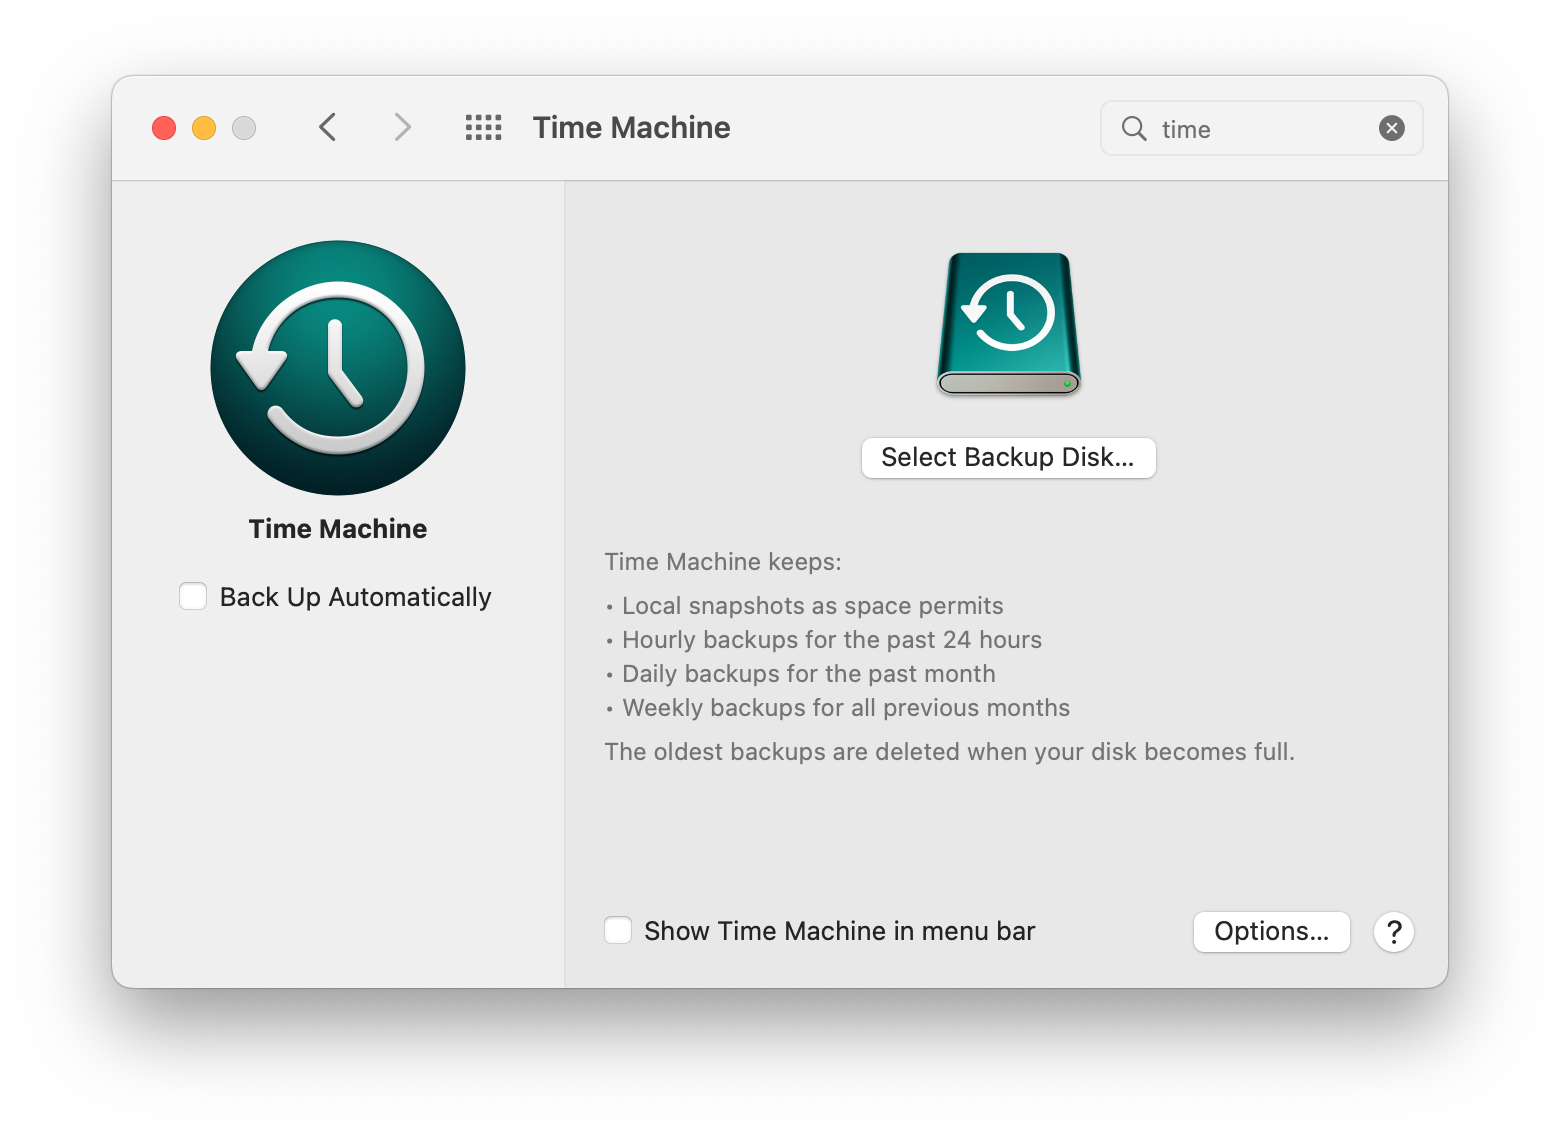
Easy encryption is one of the big advantages macOS has when it comes to Mac vs. Windows security, but it is up to you to ensure you’re taking advantage of these features since they are not enabled by default. The same can be said for Time Machine backups, so you must protect those, too. Here’s how:
- Open System Preferences, then select General > Time Machine.
- Click Select Backup Disk.
- Choose the disk you want to use, then click Set Up Disk.
- Enable Encrypt Backup, then enter and re-enter a password.
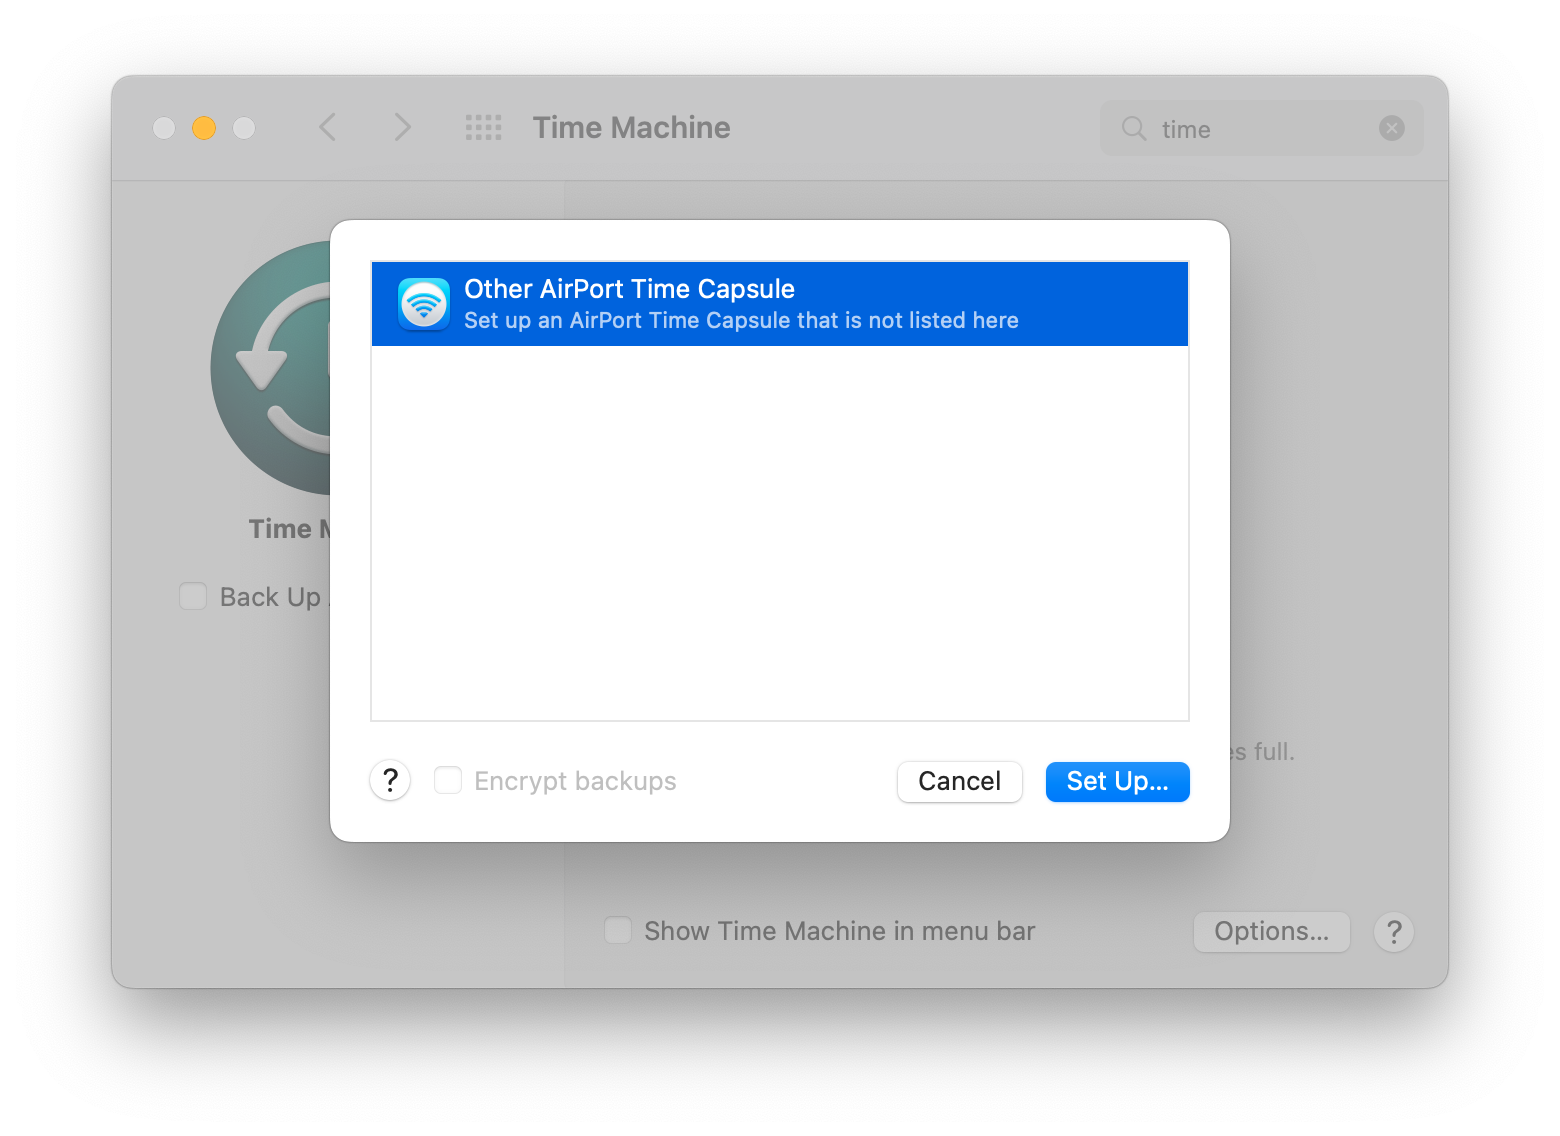
5. Click Done.
Conclusion
That’s it. Your Mac folders and files are now strictly for your eyes only but don't forget that password-protecting your Mac files is just one piece of the security puzzle. It’s essential to understand how to change security preferences on Mac at any time to ensure you have the best possible coverage. You should also use additional cybersecurity tools to stay protected.
If you want extra security, Clario Anti Spy has you covered. It scans your iPhone for jailbreaks and other security risks that could make it easier for someone to spy on you so you can keep your personal data safe.


