Table of contents
- How to check the storage on your Mac running macOS High Sierra
- Ways to reclaim disk space on macOS High Sierra
- 1. Look at disk usage
- 2. Delete Time Machine backups
- 3. Delete files and folders
- 4. Uninstall unimportant software
- 5. Remove trash
- 6. Remove junk files
- 7. Compress large files and folders
- 8. Use external storage
- 9. Install a cleaner to keep your disk in good condition
- Conclusion
Let's explore why you need to free up disk space on macOS High Sierra. Beyond dealing with bothersome reminders of full storage, your device could face a range of issues, such as:
- An unstable system: A scarcity of available disk space can lead to system instability, causing your Mac to slow down, freeze, or even crash.
- Performance problems: Limited disk space can adversely impact overall system performance, affecting the speed and responsiveness of your Mac.
- App troubles: Running out of disk space may trigger application errors and malfunctions. Some applications struggle to launch, while others fail to save data properly.
- Difficulty saving files: Limited space can pose challenges when attempting to save new files or download additional content.
- Inability to install updates: Insufficient space can prevent the installation of key macOS updates and stop the creation of Time Machine backups, leaving your system vulnerable and your data at risk.
How to check the storage on your Mac running macOS High Sierra
Checking storage on macOS High Sierra will give you a good idea of what exactly is taking up your storage space. Your Mac provides a detailed overview, showing file categories that occupy space, guiding you to identify and delete specific file types.
Here’s how to check disk space on High Sierra:
- Click the Apple logo > About this Mac.
- In the About this Mac window, click the Storage tab. Here, you’ll see a visual diagram of your available space corresponding with the file categories.

Ways to reclaim disk space on macOS High Sierra
There are multiple ways to reclaim disk space on macOS High Sierra. It all depends on what kind of files occupy your storage drive. Based on the composition of your storage, you can use the following methods to clear space:
- Look at disk usage
- Delete Time Machine backups
- Delete files and folders
- Uninstall unimportant software
- Remove trash
- Remove junk files
- Compress large files and folders
- Use external storage
- Install a cleaner to keep your disk in good condition
1. Look at disk usage
You’ll need to check disk usage to assess what kind of files are taking up space on your Mac. With this information, you can determine the specific steps needed to free up space. It’s important to note that there is no universal solution for reclaiming disk space on macOS High Sierra. Storage challenges are personalized based on your usage patterns.
Here’s how to look at disk usage on macOS High Sierra:
- Click the Apple logo > About this Mac.
- In the About this Mac window, click the Storage tab. Here, you’ll see a visual representation of your available space corresponding with the file categories.

With this insight into your storage, you can start to free up disk space using the various methods below.
2. Delete Time Machine backups
The Time Machine function generates gradual backups of your Mac. Over time, these backups occupy a considerable portion of your disk space. If you're certain you won't need to restore your system to a particular point, you can delete backups from that specific timeframe.
Note: This approach is primarily applicable to external drives used by Time Machine rather than the internal hard drive of your Mac.
Here’s how to delete Time Machine backups on macOS High Sierra:
- Connect your external backup drive to your Mac.
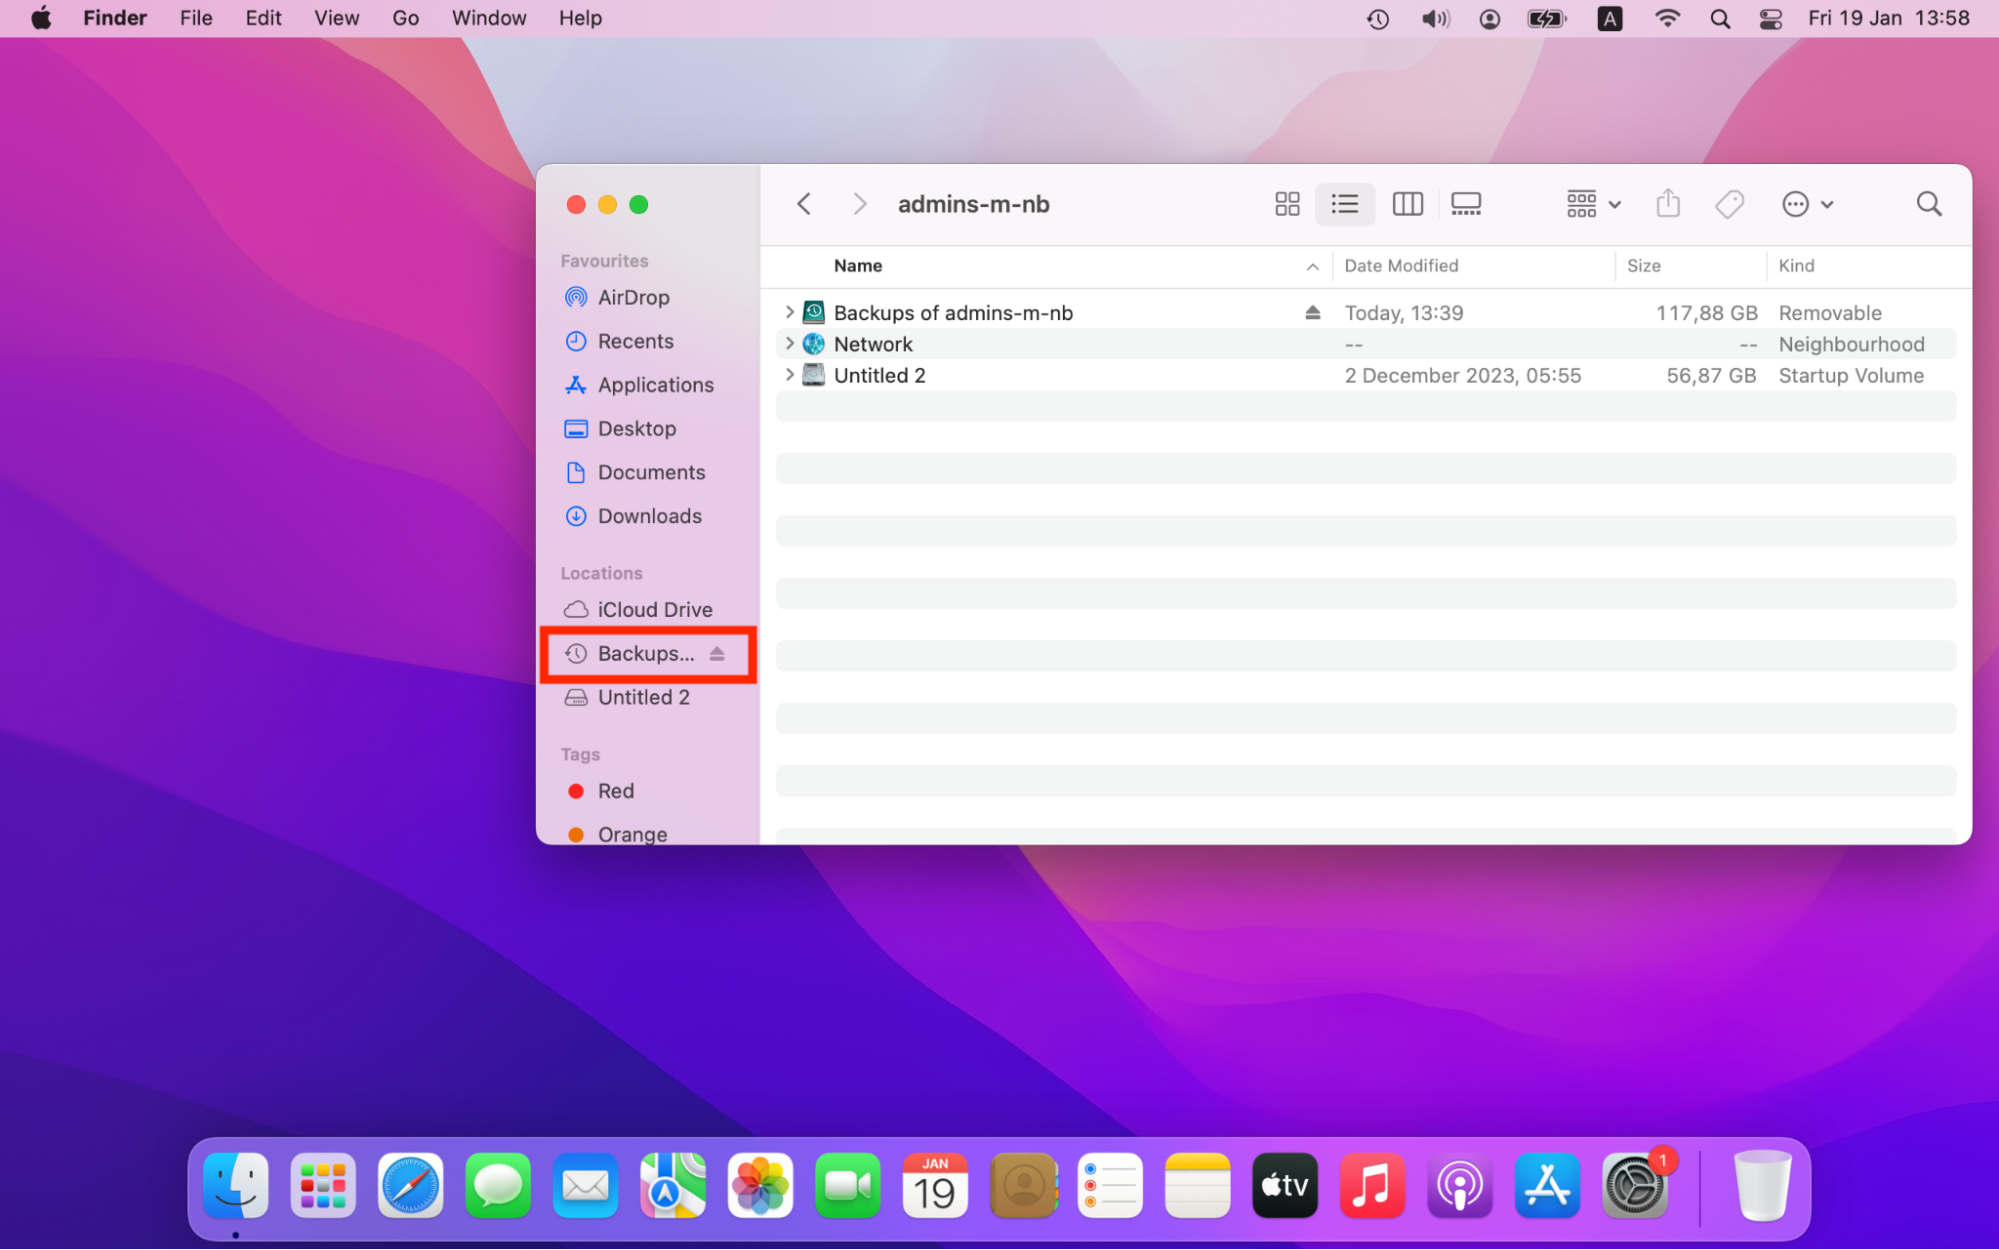
- Open Finder and go to the folder storing your Time Machine backups. This is usually on your external backup disk.
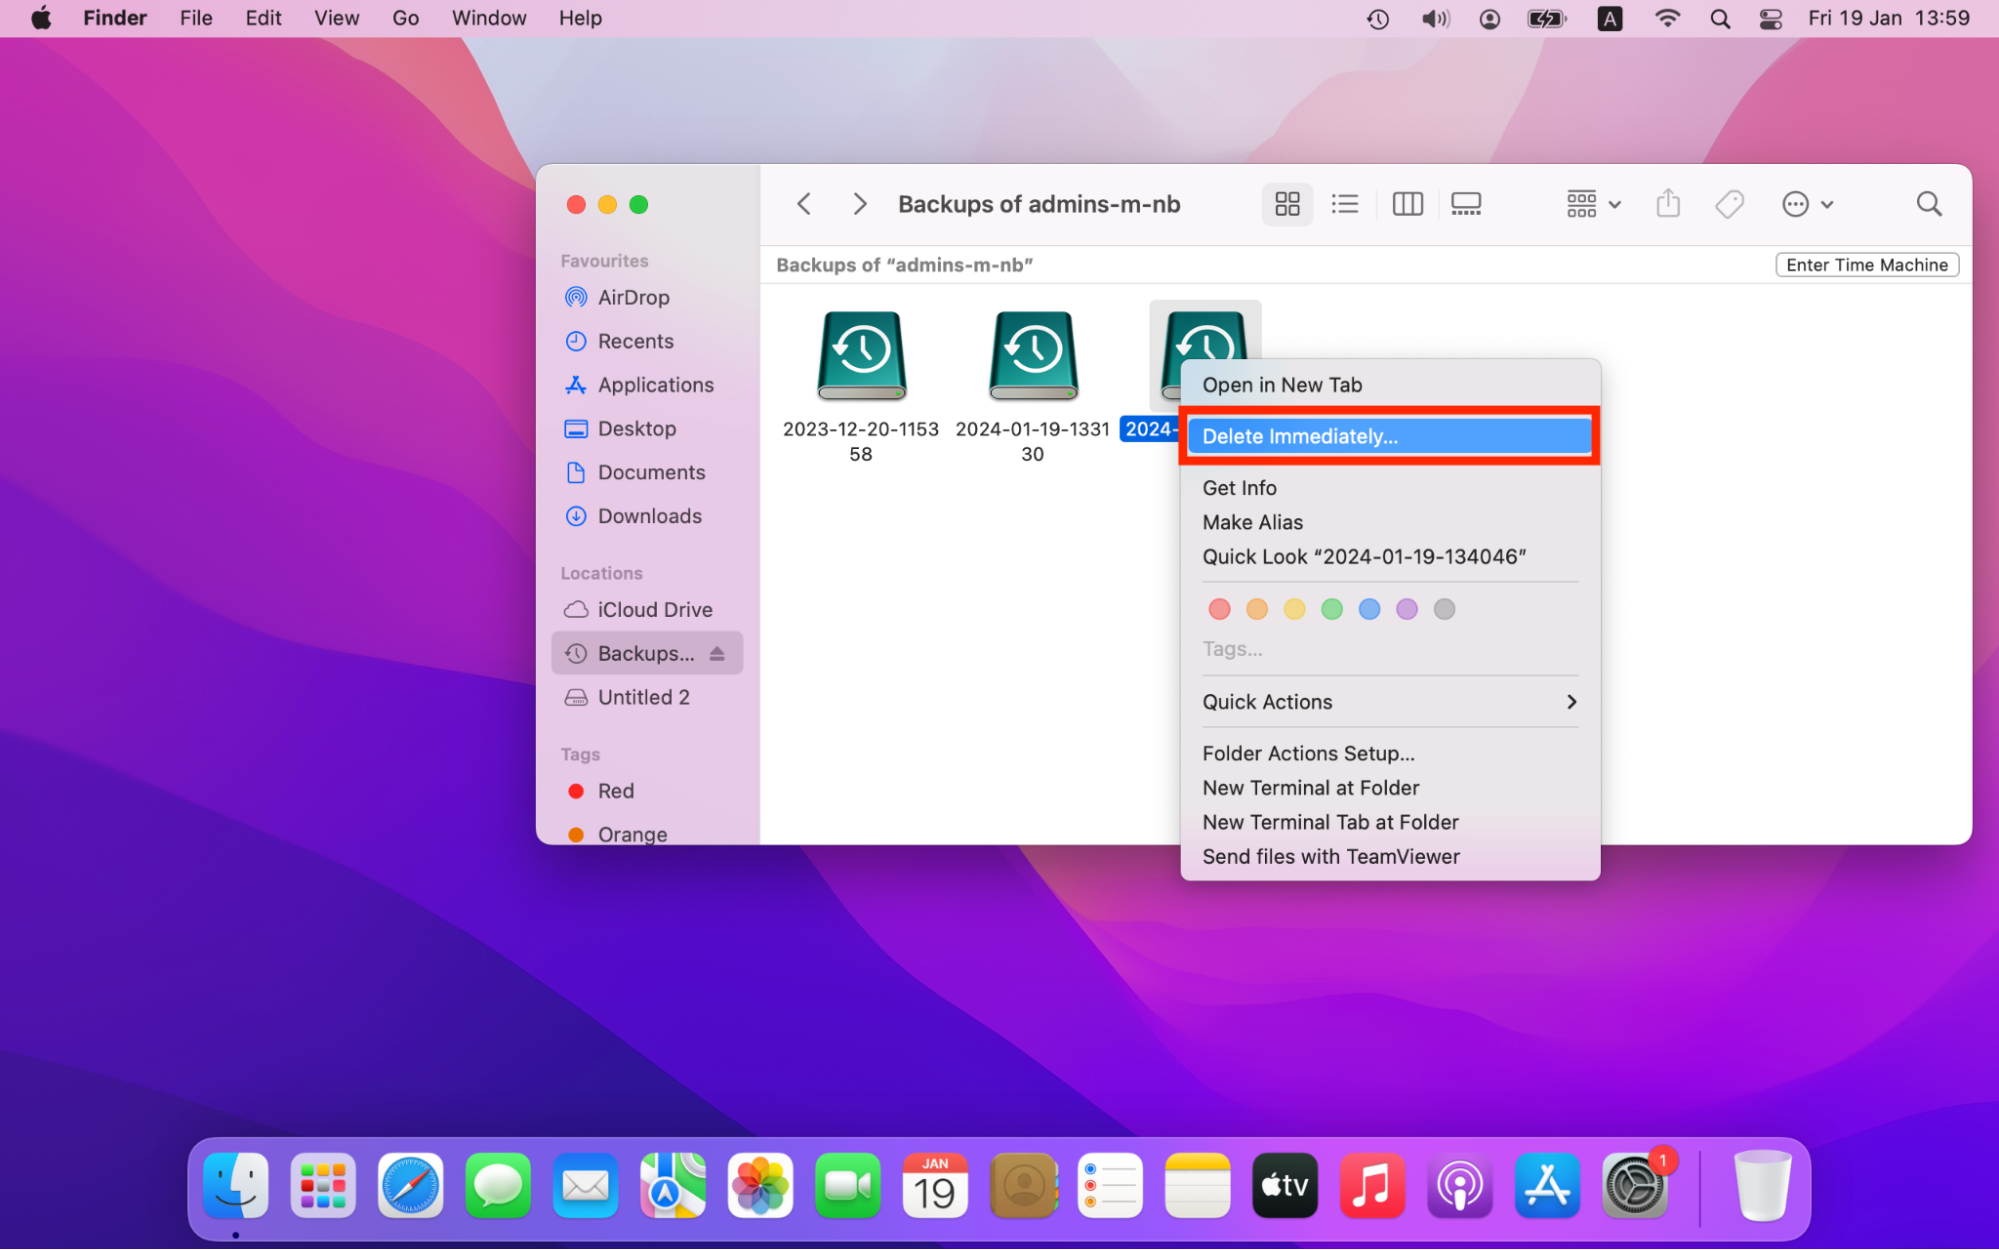
- Find the folder with the specific backup set you want to delete. Inside, you’ll find specific folders corresponding to specific dates.
- Double-click the backup you wish to delete and click Delete immediately.
- Repeat for other backups, if necessary.
- Empty trash.
3. Delete files and folders
With regular usage, your Mac is bound to get bogged down by unnecessary files and folders. We will focus on the Downloads folder, as it’s a common place for files and folders to accumulate—but know that they can be other places on your Mac, too.
Here’s how to remove files and folders on macOS High Sierra:
- Open Finder > Downloads.
- Click on the Date added or Date modified column to sort files by date, with the oldest files appearing first.
- Review the files, right-click an unneeded file, and select Move to Trash.
- Empty trash.
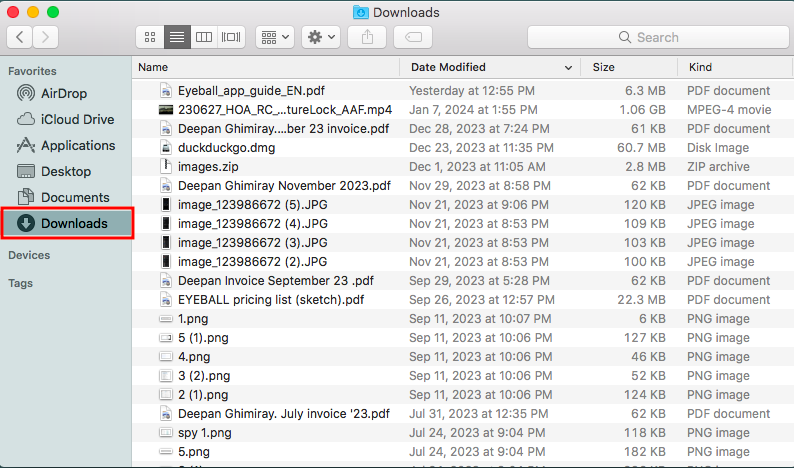
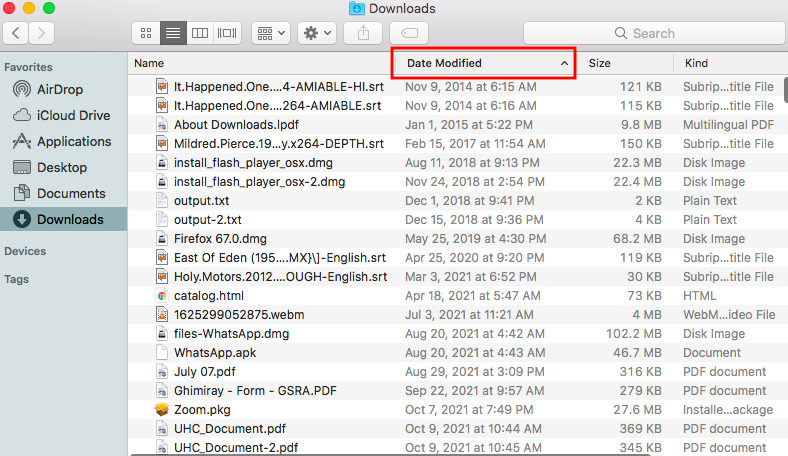
Though we sorted these files by date, macOS High Sierra gives you other options for file sorting. Based on your usage and preferences, find what works for you and start clearing up space.
4. Uninstall unimportant software
Chances are you still have some long-forgotten software still lingering on your Mac’s storage. Usually, it’s an app that you stopped using or thought you deleted. Whatever the culprit, unimportant software could potentially take up a lot of space.
Here’s how to clean apps on macOS High Sierra:
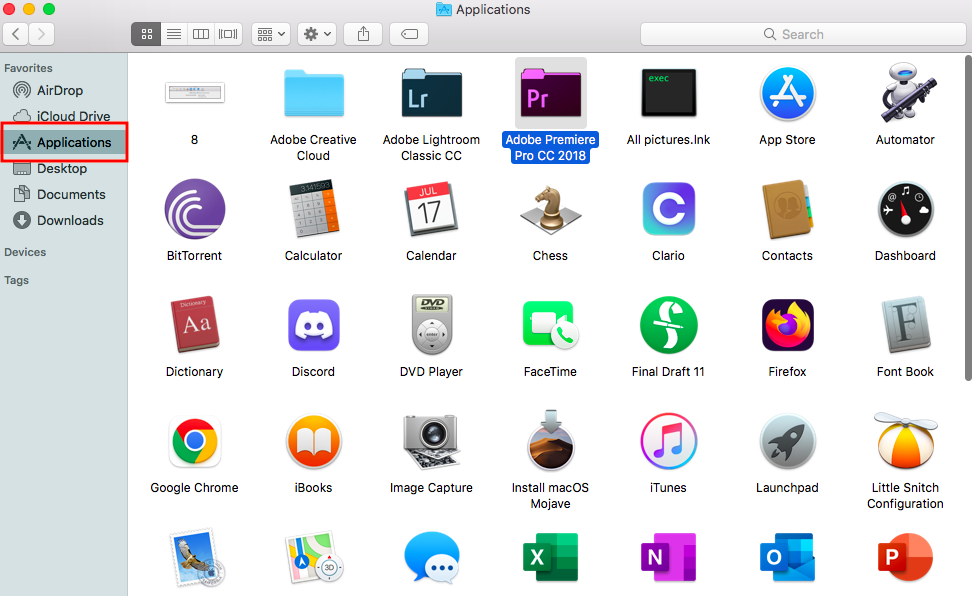
- Open Finder > Applications from the left sidebar.
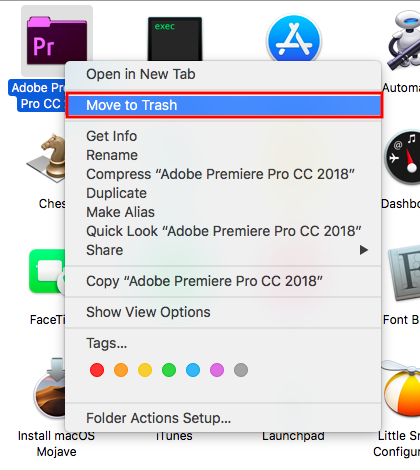
- Right-click an unneeded app, and select Move to Trash.
- Empty trash.
While you are on it, make sure you try updating your macOS so that you can take advantage of the new security patches.
Take a moment to think about what else might be lurking on your devices, too. Old apps on your Mac are easy to spot, but unwanted spyware on your phone is not always as obvious. Some apps can disguise themselves, hiding in plain sight while tracking what you do.
Clario Anti Spy helps you find these threats and shows you ways to get rid of them. A quick scan can reveal if anything suspicious is running in the background, so you can remove it before it causes damage.
This is how to check your iPhone for security risks with Device system check:
- Open Clario Anti Spy on your iPhone.
- Tap Device system check in the main menu.
- Run a Scan to detect jailbreaks or security risks.
- Follow the recommendations to secure your device.

5. Remove trash
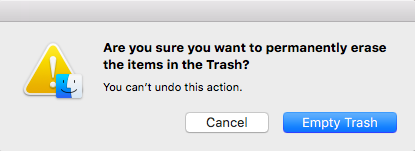
Just because you moved files to the Bin doesn’t mean the job is done. You’ll need to clear your Bin in order to permanently delete its contents. Otherwise, it remains in your Mac’s storage space.
Here’s how to empty trash on macOS High Sierra:
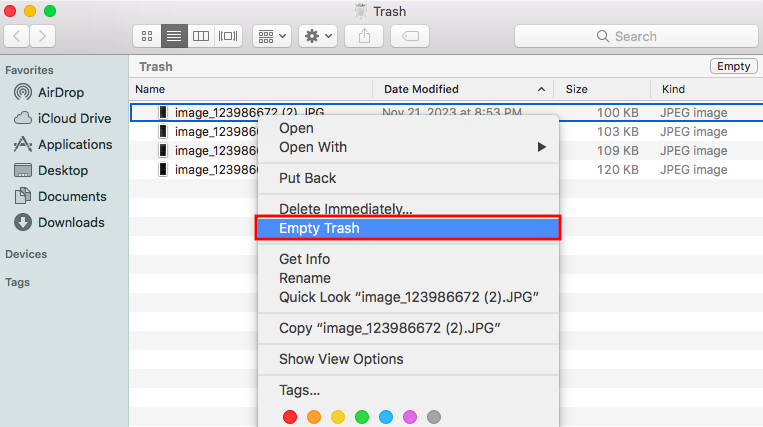
- Open the Trash icon, right-click, and select Empty Trash.
- Click Empty Trash to confirm the action.
6. Remove junk files
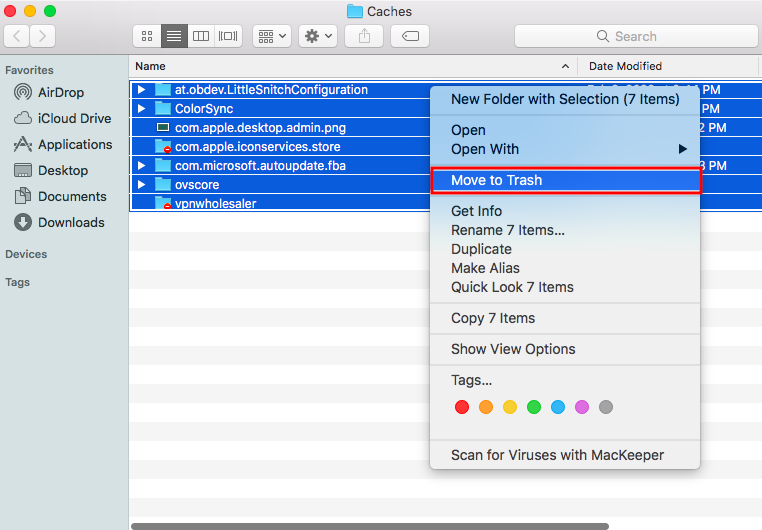
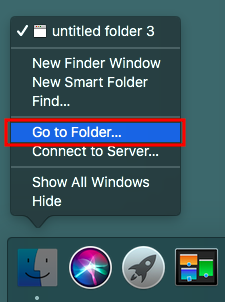
Over time, junk files accumulate and take up valuable Mac storage space, often without your awareness. While "junk" encompasses various file types, our emphasis will be on system cache files. While beneficial for performance and load times initially, these files can have the opposite effect when they become excessive.
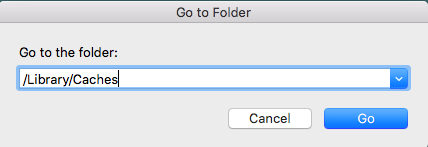
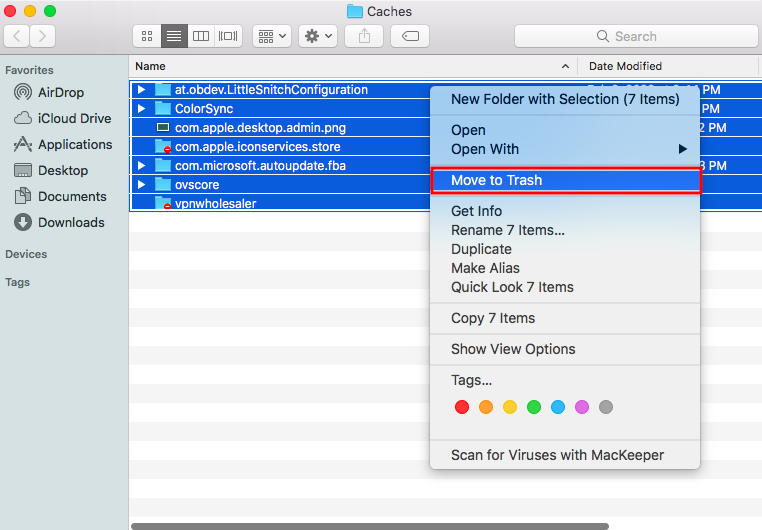
Here’s how to clear the cache on macOS High Sierra:
- Right-click Finder on your dock and select Go to Folder from the menu.
- Type the following path: /Library/Caches, and press ENTER.
- Select all the folders, right-click, and select Move to Trash.
- Empty trash.
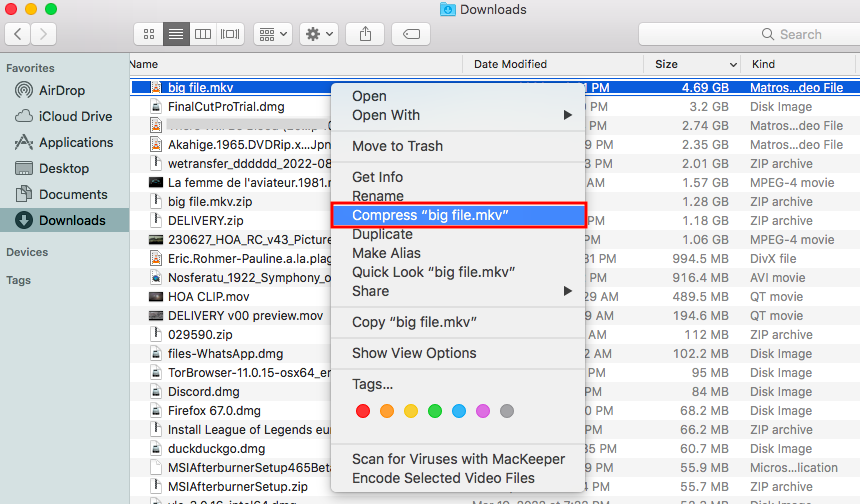
7. Compress large files and folders
Mac’s compression feature lets you reduce the size of your large files and folders, allowing you to save space on your Mac’s drive. To compress files or folders, right-click on the item and select Compress (file name) from the menu. Single files will appear as the original file name with the .zip extension. Multiple files will appear as Archive.zip.
8. Use external storage
If you have too many essential items on your storage that you can’t delete, consider getting more storage on a Mac with an external hard drive to instantly expand your storage capacity. You can use an external drive for general storage, or you can use it exclusively to store your large files, like high-resolution videos and raw photos.
9. Install a cleaner to keep your disk in good condition
Let’s face it: sifting through your files and folders to make space is no fun. There are safe cleanup tools, like MacKeeper, that are designed to quickly purge your disk of junk, duplicates, and useless apps—all without the hassle of clicking through endless folders.
Conclusion
If your Mac is running High Sierra, freeing up disk space can breathe new life into your device. Based on your disk usage, learn what’s taking up space on your Mac, then use the necessary methods to make space. But remember, through regular usage, your storage is bound to fill up again—so regularly maintain enough space on your Mac.
Make sure your phone security is not falling behind, either. Clario Anti Spy helps protect your privacy by spotting security risks on your iPhone, so you are not an easy target for hackers.


